Whether you’re revving up for a grand cycling event or gearing up for an epic biking vacation, ensuring the safety of your ride before you blaze down the trails is paramount.
The ‘M check’ is your ticket to a dependable and smooth ride. This straightforward approach ensures your bike is always ready to roll, with all parts functioning optimally.
I’ve outlined an easy-to-follow, step-by-step guide below, equipping you with the tools you need to keep your bike in tip-top shape on a regular basis. So, get ready to gear up.
What is the M Check
The M check is a fundamental bicycle safety check procedure that involves inspecting all of the crucial functioning components of a bicycle, starting from the front hub and progressing toward the rear.
Its name is derived from the pattern followed during the check, which resembles the letter M.
Adopting this pattern helps in promptly identifying any potential problems with the bike, making it a useful technique to follow. With practice, conducting a comprehensive check using the M check method should only take a few minutes.
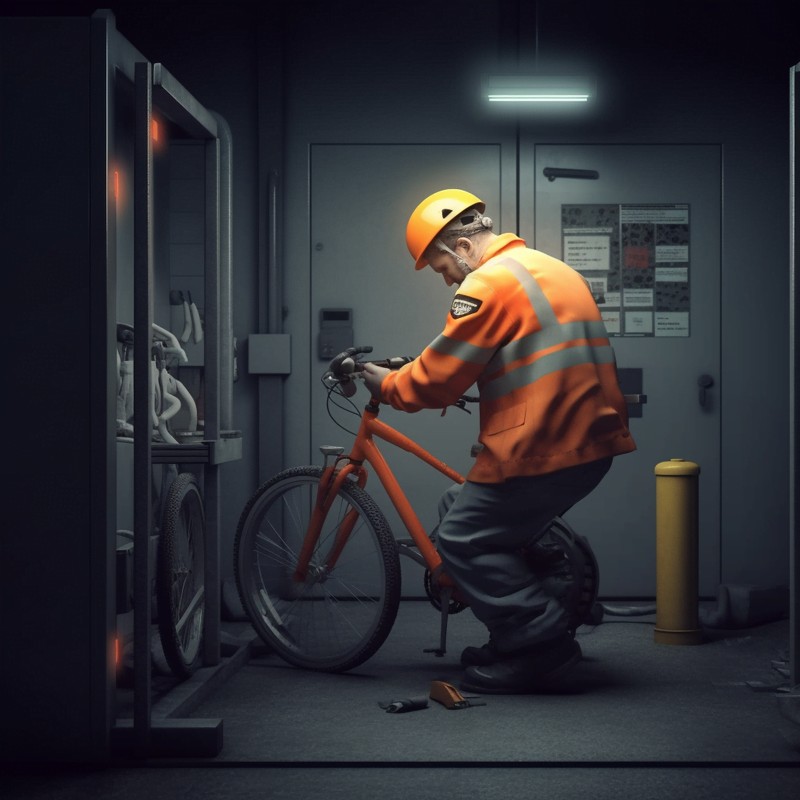
Tools Needed to Perform an M Check
Performing an M check on a bicycle typically requires only a few basic tools. Here are some of the tools you may need:
- A bike pump to check and adjust tire pressure if necessary.
- A set of Allen keys or a multi-tool with Allen keys to tighten or adjust bolts.
- A screwdriver (flat or Phillips) to adjust screws or bolts.
- A wrench or pliers to adjust cables and brake pads.
- A chain lubricant to lubricate the chain.
- A rag or paper towel to clean the bike and wipe off any excess lubricant.
Note that the specific tools needed may vary depending on the type of bike you have and the components that need to be checked. However, the above tools are usually sufficient for a basic M check.
If you are unsure of how to perform an M check, it’s always best to consult a professional or experienced bike mechanic.
How to do Bicycle Safety Check on an Adult’s Bike
Step 1: Wheels, Brakes & Hubs
Ensure that the bike’s wheels are firmly attached.
In the present era, wheels are usually fastened with a quick-release skewer or a variant of a bolt-thru axle.
If your bicycle uses quick-release mechanisms, you can fasten them by pushing the lever down and adjusting the nut on the other side until it snugly fits against the fork (or frame).
Subsequently, open the lever and rotate the nut an additional complete turn. This should allow you to securely tighten the quick-release without exerting too much force, guaranteeing the wheel is securely and correctly positioned in the dropouts.
Performing this task while the bike is on the ground can assist in ensuring the wheel is properly aligned within the dropouts.
There are various types of thru-axles. Some resemble a quick-release mechanism with cammed levers, while others are simple threaded options. Regardless of the type, their function remains the same.
Bolt-thru axles typically thread through the hub and screw into the opposing fork leg or chain stay. Before cycling, it’s crucial to confirm that the closure system is secured following the manufacturer’s guidelines.
Next, confirm the hub’s good condition by gently swaying the wheel from side to side to examine any play or lateral movement.
Spin the wheel. If you detect a grinding noise or if it seems coarse, it might be necessary to service or replace the bearings.
While spinning the wheel, observe if the disc or wheel rim passes smoothly through the brake caliper. In case of any rubbing, the brakes or caliper may need adjustment.
Lastly, test the brake levers to confirm the brakes are functioning as expected. If the hydraulic brakes seem slightly squishy, they might need bleeding.
If your cable pull brakes don’t provide a firm and decisive feel, you may need to adjust the cable tension or change your disc brake pads.
Step 2: Bike Tires
Ensure that the tire is properly seated in the rim. Examine the bead where the tire makes contact with the wheel rim and ensure it appears even and uniform all the way around. If it appears uneven, it may be necessary to reinstall the tire.
Once you are satisfied that the tire is seated correctly, inspect the sidewalls and tread for any signs of excessive wear or damage. It is crucial to replace worn or torn tires before riding, as they can pose a safety risk.
Since there are no specific regulations or markers on bike tires, you need to rely on your own judgment. For road tires, you may start to notice a flat spot, and if you can see the carcass of the tire, it is a definite sign that it needs replacement.
Mountain bike tires can experience degradation of the knobs, and once they are worn away, the tire becomes virtually useless and should be replaced.
If you have a tubeless tire setup and haven’t ridden the bike for a while, it is advisable to open the bead and check that the sealant has not dried out.
While inner tubes naturally lose a small amount of air over time, finding a fully flat tire when returning to your bike suggests a possible puncture.
Dealing with a puncture during a ride can be inconvenient, so it is recommended to take the time to fix any punctures, even slow ones, before heading out.
Before riding, always inflate your tires to the appropriate tire pressure. Keep in mind that optimal tire pressure varies between road bikes and mountain bikes.
Step 3: Bike Suspension Components
Proceed to examine the fork thoroughly for any indications of hairline cracks or damage. In the case of a suspension fork, inspect the stanchions for scratches or excessive suspension fluid near the bolts.
It is important to keep in mind that some forks are designed to have a small amount of oil on the stanchions, known as a “witness mark,” which is considered normal and expected.
If your bike features front and rear air suspension, it’s recommended to periodically verify that the sag is accurately set, typically about once a month.
Step 4: Bike Cockpit
Inspect the headset for any signs of looseness or play.
To examine the headset, gently rock the fork forward and backward while applying the front brake. This motion will help identify any noticeable play. If you detect a knocking sensation, try pinpointing its source by placing your fingers on the joints.
Subsequently, lift the front wheel off the ground and slowly turn the handlebar. If you encounter any grinding or resistance, it may be necessary to service or replace the headset.
Ensure the stem is securely fastened by keeping the front wheel straight with your knees and pushing on the handlebar. You should be able to exert a reasonable amount of force without causing the stem to rotate on the steered tube.
Stand over the bike and move the handlebar forward and backward. If your bike is equipped with drop handlebars, apply pressure to those as well. Neither the bars nor the grips should display any movement.
For bikes featuring flat handlebars, it is also important to verify that the brake levers and shifters are firmly secured in place.
Step 5: Bike Frame
Inspect the bike frame meticulously to identify any hairline cracks. In the event of discovering such cracks, it is essential to have the frame examined by a professional.
Proceeding downwards on the frame, ensure that all frame accessories, such as bottle cages, are securely attached and not causing any rattling.
Conduct a visual inspection of the entire frame, paying particular attention to the welds if applicable.
In the case of a frame equipped with a suspension system, verify that the shock mounting bolts firmly secure it in place and that the shock itself is in optimal working condition, similar to the fork.
Step 6: Cranks & Pedals
Rotate the cranks in the opposite direction to avoid causing the rear wheel to spin. When the drivetrain operates smoothly, it indicates that the bottom bracket is also functioning properly.
Thoroughly examine the chainrings for any signs of damage, missing teeth, or excessive wear. Worn-out chain rings will exhibit a shark-fin-like shape.
Gently rock the cranks towards the frame to detect any grinding, resistance, or looseness. If you sense any play, it may indicate the need to replace the bottom bracket.
Evaluate the bike pedals by giving them a spin. Ideally, a well-maintained pedal should not rotate freely due to the presence of grease. Once again, check for any play by moving the pedal body.
If you notice any issues with the pedal’s performance, it might be necessary to replace or service it. Additionally, ensure that your pedals are correctly installed.
For clipless pedals, assess the condition of the metal or plastic cleat on your shoe. Verify that it is securely bolted, exhibits no excessive wear, and allows for smooth clipping in and out based on your preferred resistance level.
Step 7: Saddle or Seat Post
Regularly take out the seat post from the frame and clean it thoroughly.
If your bike has aluminium, titanium, or steel components, it’s recommended to apply grease before reinstalling the seat post. However, if you have a carbon frame or seat post, you should use a carbon grip paste specifically designed for this purpose.
This paste, resembling grease but with added particles, enhances friction between the components.
It’s crucial to pay extra attention to this step since a seized seat post can cause irreparable damage to the frame.
Once you reinstall the seat post and adjust it to the appropriate saddle height, ensure that the saddle is securely fastened in the clamp. Double-check its stability before riding.
Step 8: Rear Wheel and Drivetrain
To ensure the safety of your bike’s rear wheel and drivetrain, you can follow a similar process as you did with the front wheel. Inspect the hub, tires, and brakes for any signs of looseness, effectiveness, rubbing, or wear.
Next, turn the pedals by hand and observe the movement of the chain, making sure there are no stiff links and that it runs smoothly.
You should also shift through all gears using both the front and rear derailleurs, ensuring that the chain shifts up or down one set of teeth for every click of the shifter.
If you experience any hesitation, dropping off teeth, or inability to shift, you may need to adjust your bike’s gears.
It’s important to perform regular pre- and post-ride checks, as well as familiarize yourself with your bike, so you can identify any issues as soon as possible.
Be on the lookout for any unusual mechanical sounds, frame creaks, or abnormal behavior while riding, and take action to address them promptly.
How to do Bicycle Safety Check on a Children Bike
Ensuring the safety of a children’s bike is crucial. Similar to an adult bike, you can perform a modified version of the M check for a quick and thorough review. Here are the steps:
Tires and Wheels
Check that the tires are properly inflated according to the manufacturer’s recommendation (usually printed on the side of the tire). Inspect the tire tread for any wear, embedded objects, or damage. The wheels should spin freely without wobbling.
Brakes
Test both the front and rear brakes. The brake levers should be easy for the child to reach and operate. When applied, the brakes should stop the bike smoothly and completely.
Seat
The seat should be securely fastened and adjusted to the proper height. When seated, the child should be able to touch the ground with both feet.
Handlebars
Ensure the handlebars are secure and aligned with the front wheel. The grips should be secure and not worn out.
Pedals and Chains
The pedals should spin freely and be securely attached. The chain should be clean, well-lubricated, and tight (but not too tight).
Reflectors and Lights
If the bike is used during dawn, dusk, or night, it should have front and rear lights and reflectors for visibility.
Bell or Horn
All kids’ bikes should have a working bell or horn.
Frame
Check the frame for any damage or rust. The bike should be the correct size for the child. They should be able to comfortably reach the handlebars and pedals.
If you notice any issues during this check, it’s important to address them before the child rides the bike. If you’re unsure about any aspect of bicycle safety, it’s a good idea to have it checked by a professional.
Teaching your child to do this check along with you can also be a great way to instill a sense of responsibility and the importance of safety from an early age.
Can I Perform an M Check with No Mechanical Experience
Absolutely! The beauty of the M check is its simplicity. It’s designed to be a quick and easy method for anyone – regardless of mechanical experience – to check the basic safety and functionality of a bike.
The M check involves examining key parts of the bike in an ‘M’ pattern, starting from the front wheel (bottom of the M), moving up to the handlebars (top left of the M), down to the pedals (middle of the M), up to the seat (top right of the M), and finally down to the rear wheel (bottom of the M).
During this check, you’re essentially looking for anything that might be loose, worn out, or not functioning properly. This could include checking the brakes, tires, chains, gears, and lights among other things.
If you do find something during your M check that seems out of place or not working as it should, and you’re unsure how to fix it, it’s a good idea to take your bike to a professional for further inspection and repair.
So, you don’t need to be a bike mechanic to perform an M check. It’s a great way for cyclists of all levels to ensure their bike is safe to ride. And it will also help you become more familiar with your bike and how it works, which can be very rewarding.
How to Deal with Serious Issues Encountered during an M Check
If you identify a serious issue during an M check, it’s crucial not to ignore it. Riding a bike with a significant problem can be dangerous and could result in injury or further damage to the bike. Here’s what you should do:
Stop using the bike
Until the issue is resolved, it’s safer not to use the bike. Continuing to ride could worsen the problem or put you at risk.
Identify the issue as clearly as possible
Try to understand what’s wrong. Is the chain broken or just loose? Are the brakes not responding, or is it just a minor delay? The more specifics you can provide, the easier it will be to get the problem fixed.
Consult a professional
If the problem is beyond your skill level to fix, take your bike to a professional mechanic. Bike shops have the tools and knowledge to address most issues quickly and effectively. Describe the problem as clearly as you can, and they’ll take it from there.
Learn from the experience
If you’re interested in becoming more self-sufficient with your bike maintenance, use this as a learning opportunity. Ask the mechanic what caused the problem and how you can prevent it in the future.
Remember, regular M checks can help catch issues before they become serious, so make them a part of your routine to ensure safe and enjoyable rides.
Conclusion — Bicycle Safety Check
And there you have it – your ultimate guide to achieving a safer, smoother, and more enjoyable ride with the power of the M check!
A well-maintained bicycle isn’t just a ride; it’s a trusted companion on every journey, be it a thrilling mountain trail or a peaceful ride through the park.
As you confidently master these 8 steps, remember: every check brings you one pedal stroke closer to an unmatched cycling experience. So saddle up, perform your M check, and let the roads be your playground.
Embrace the thrill of the ride, knowing you’re armed with the knowledge to keep your two-wheeled friend in peak condition. Please share your thoughts and feedback on the article in the comments section. Please like, share, and follow our Facebook Page for more guides like this. Let’s roll into a safer cycling future, one M check at a time, and Have fun riding!
Bicycle Safety Check — Frequently Asked Questions
How often should I perform an M check on my bike?
The frequency at which you should perform an M check on your bike can depend on how often and in what conditions you ride. However, as a general guideline, it is a good idea to perform an M check:
1. Before any long-distance rides or important events, ensure that your bike is in top condition and safe to ride.
2. After any incidents or accidents, check for any potential damage.
3. If your bike has been stored or unused for a long period of time, ensure everything is still functioning as it should.
4. Regularly during periods of heavy use, for example, if you’re commuting daily, a weekly M check would be advisable.
5. In essence, an M check should be part of your regular maintenance routine. If you cycle frequently, this might mean performing an M check weekly.
If you’re an occasional cyclist, doing a check before each ride could be a good habit to develop. Remember, it’s always better to spot a small issue before it becomes a big problem.
Can I perform a pre-ride cycle safety check instead of an M check?
Yes, you can certainly perform a pre-ride safety check instead of an M check, especially if you’re about to go on a short, casual ride.
However, it’s worth noting that the M check is a more comprehensive process and is likely to identify potential problems that a quick pre-ride check might miss.
Related: