Most people don’t spend much time thinking about how to ride a bike. After all, it’s just a matter of getting on and pedaling, right? Well, that’s not always the best approach.
This article will teach you the ropes of biking to take your riding skills to the next level. Before moving ahead we will discuss some basic terms about the bikes essential for the newbies. So get ready to become a seasoned bike rider!
What does a Beginner Cyclist Need to know about Bicycles
1. Purpose of Different Types of Bikes
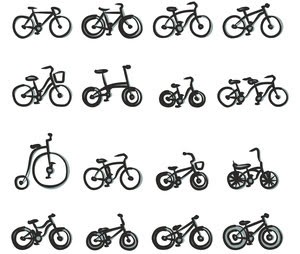
Bicycles come in all shapes and sizes. Your bike size will depend on your height, weight, and riding style. Bicycles can also be classified according to their purpose. Cruise bikes are used for long rides because of their risk-free nature.
Hybrid bikes have both hard and soft parts for different terrains; road bikes are faster but are a more significant challenge to ride; mountain bikes are designed for rugged terrain and include larger tires that can provide better grip plus are stable.
BMX bikes are designed explicitly for stunts and tricks, and a child’s bike is usually a two-wheeled pedal-less bike, which requires keeping one foot on the ground at a time. In starting, you prefer riding a bike that gives you confidence, speed, and focus, plus running smoothly.
2. Importance of Learning Important Skills
Just like any other mode of transportation, biking also requires skills. You must learn how to balance and apply brakes to ride a bike. To learn balancing and braking, you can either use a trainer, go to an empty land with lots of grass, or try it in your nearby parking lot.
An exercise bike with pedals is needed if you plan to go for a coach. However, riding on your own street is the easiest way to learn to bike. Initially, you should learn how to ride in a small area, such as your driveway or a nearby park. Once you are comfortable riding in these areas, you can move onto more significant streets and hills.
If you love biking, you will be more likely to continue doing it. So, make sure to love it to learn it in an easier way.
3. Right Balance Method While Riding
The best way to stay balanced on a bike is to get into a “standing position.” The goal is to hold your balance without using your hands or feet. Ideally, you should have equal force and pressure distribution between your feet and your hands in this position.
You’ll need to balance the bike on one foot and the other to get into the standing position. Try not to lean too long forward or backward.
Once you have balanced the bike on both feet, tuck your belly and slowly move your feet close until you are in the “standing position” described above. If you find standing challenging, try using one hand to help support yourself while you ride.
Be sure to keep your head and neck up to see where you are going, and avoid leaning in a down position. There are also specialized bikes that can be balanced with just your hand. These bikes are known as “doubles,” they are a great option if you find it challenging to stay standing.
The suspension system on a bike improves your chance of regaining balance if you constantly lose it due to some sort of distractions. By smoothing out bumps in the roads, suspension systems can make turns and stand easier.
Want to Learn How to Ride a Bike as an Adult
Most adults are either afraid or don’t know how to ride and balance bikes. Possibly they have learned it a few times and quickly lost interest, or maybe they never learned to ride before. Whichever scenario you roll under, our simple steps can help you better understand how to ride a bike as an adult in no time. Here are some factors that should be kept in mind while learning bike riding. Keep reading
1. Get a Bike that Serves your Needs
No matter whether you’re rolling out for the first time or upgrading, you should consider several factors when getting a bike. With the help of our suggestions, you can easily pick and reward yourself with the most appropriate brand bike that exactly fits your requirement criteria.
First, decide if you want a bike for transportation or recreation. If you intend to use your bike only for short distances, you should invest in a transportable bike. These bikes are lightweight and can be turned quickly, making them perfect for cramped cities.
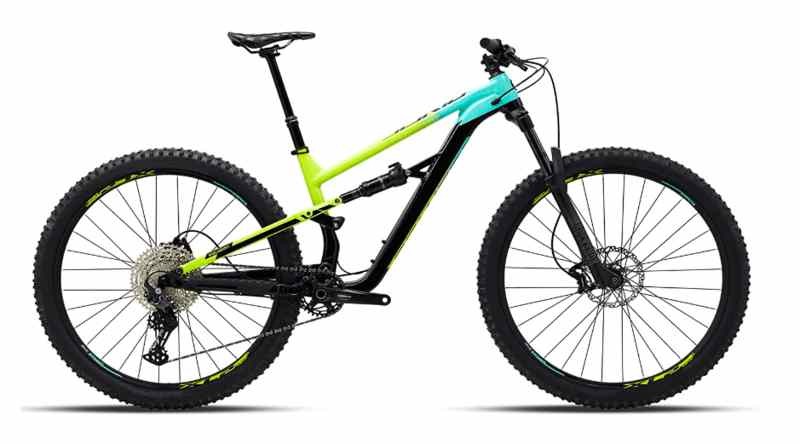
On the other side, if you’re looking for something you can ride on recreationally, you’ll need to consider what type of terrain you’ll be riding on. A mountain bike is best suited to rough terrain, while a street bike is better suited to flat terrain.
You should also pay attention to the type of frame on your bike. A hardtail frame is good for durability, while a cruiser frame is more relaxing and better suited for cruising.
Also, consider what size wheels your bike has and whether you want suspension. All these factors are very important in training you how to ride a bike and balance it.
2. Ensure Bike Size is Comfortable
Once you know the kind of bike, you need. Now is the turn of bike size. Always shop for something that fits you well.
How to Know If a Bike Fits You Well
Check Size Chart
Most bikes come in different sizes, so check the bike size chart before buying to ensure you get the right one. Some brands offer free returns if you order the wrong size, so there’s no reason not to take the time to find what’s right for you.
Take Inseam into Account
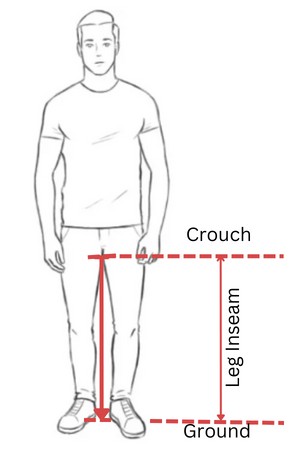
The inseam is the distance between your upper thigh and ankle. The most basic way to measure the length of your inseam is to take a measuring tape and calculate the distance from just beneath your crotch to below the bottom of your ankle.
Inspect Frame Size
Tall riders should aim for bikes with taller frames, while shorter riders should look for ones with lower frames. Be sure to allow enough clearance between your seat and the ground, as this will ensure a comfortable ride
Ride a Few Bikes Before Finalizing
This will help you get a feel for the different styles and sizes available and determine which is best for your body.
Note: If you can maintain balance on the bike seat and your leg, you can learn the riding process quickly. But for this, you need a correct bike fit. So don't hesitate to consider all the above tips before making your next purchase.
3. Now Set Up your Bike
Anyone can set up their bike, regardless of their experience or skill level. But you should thoroughly read this guide before getting started to achieve the best results.
Here is how to Set Up your Bike
Follow these simple doable steps to set up your bike on your own:
Locate Frames
Firstly, locate the frames of a bike. The frame contains the bike’s front and rear triangles, which hold the front and back wheels in place. Furthermore, it’s also where you attach the handlebars, pedals, and shifters (if you have them) to the bike.
Typically, a two-wheel frame is attached to the ground by the front and rear wheels, while a four-wheeler’s frame is attached to the ground by both the front and rear wheels.
Raise Up the Rear Wheel and set it aside on Either Side of the Frame
If your bike has clipless pedals (pedals attached directly to the frame), remove them by unscrewing their mounting bolts. For bikes without clipless pedals, you can remove pedals by lifting them off of their axles and pushing them off with your feet.
If your bike has a front wheel, set it in front of the frame by pressing it against the front fork. However, if that’s not the case with your bike, then you can attach it to the frame using the included bolts (typically, the rear wheel is attached to the frame, and the front wheel is free-floating).
Install Handlebars
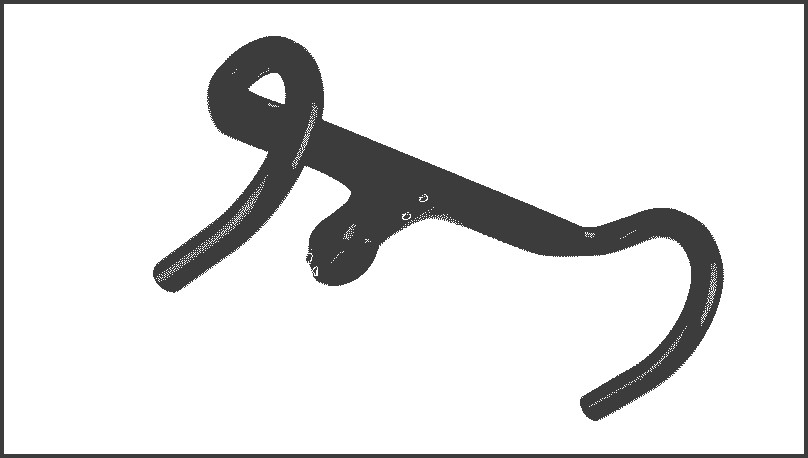
Attach the handlebars by tightening their bolts (depending on their design). Ensure the handlebar grips are positioned so your hands are relaxed while riding; most bikes feature adjustable handles.
Set Pedals
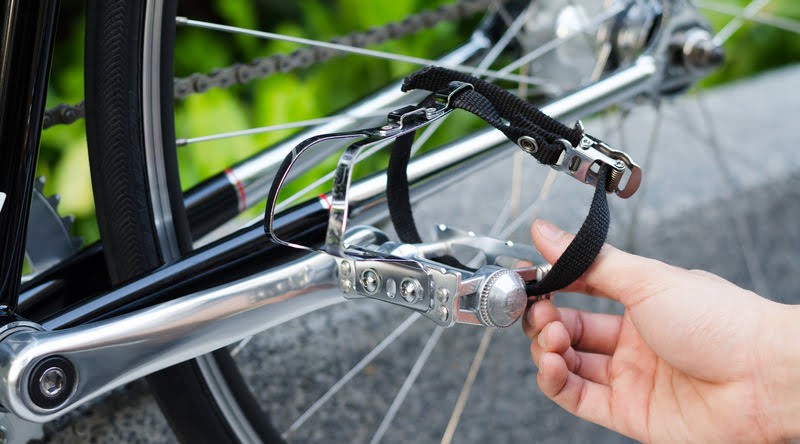
If your bike has pedals, attach them by tightening their bolts or straps. Most bikes come with adjustable-length pedals, so you can easily customize them to fit your feet thoroughly.
Tighten Shifter Bolts
If your bike has a shifter (a pedal that changes gears), tighten its bolts or straps. Most bikes come with an adjustable shifter so that you can fine-tune its position on your pedalboard.
Set Straps
Now is the time to tighten your bike’s bolts or straps if it has a front or rear rack. Most bikes come with adjustable racks in height and width, so you can customize them to fit your needs.
4. Practice how to Maintain Balance on the Bike
Learning how to hop on and off your bike is a very important step towards becoming comfortable and maintaining balance. Having this essential skill will help you hold the bike more safely and efficiently. As soon as you know how to hop on and off, practice doing it while seated in the bike’s center.
After that, try standing next to the bike. Lastly, pedal by sitting on your bike in a small circle several times, jumping on and off. Also, remember to wear loose clothes. These basics can make you a pro in no time.
5. Learn how to use Brakes in Easy Ways
When you need to apply the brakes, squeeze them firmly and don’t apply too much pressure on your hands. You won’t need to jump off the brakes; you just need to ease off a fraction and then instantly apply them again if required. This will help ensure that you’re stopping as smoothly as possible.
How to Brake with Rear Brake
To brake with the rear brake of a bike, you need to shift your rest force and pressure to the other foot and squeeze the brake pedal. So, this is how rear brakes work.
How to Brake with Front Brake
If you’re new to bicycling, one of the first things you’ll need to learn is how to apply the brake with the front brake and hold it. To brake with the front brake, squeeze the lever as hard as possible, then release it. This will stop your running bike. Note that if you hit something with the front wheel, you may need to use the rear brake to stop.
How to Brake with Both Brakes
Hold down the left lever and use the right hand to bring the brake and pedals to the floor to brake with both brakes. At the same time, release the left hand from the lever. Release the left brake lever and one pedal when you are ready to stop.
6. Learn how to Glide
Cycling is a great way to get around town, but learning how to ride a bike can be tricky. Gliding is an excellent way to learn. During gliding, you use your body and momentum to keep balance on the bike while keeping your hands and arms relaxed.
For better gliding, follow these tips:
- Don’t tense your arms or hands
- Stay balanced by pleating your body and using enough momentum
- Propel your body forward
- Concentrate on your goal – ride a bike!
7. Start Pedaling
By now, you’re ready to start pedaling. Keep your feet flat, and push off with your heels. Next, swing your arms forward and upward, and keep your head down. Your hands will help you stay balanced as you pedal, so use them for guidance. And remember: Don’t brake until you reach the end of the lane.
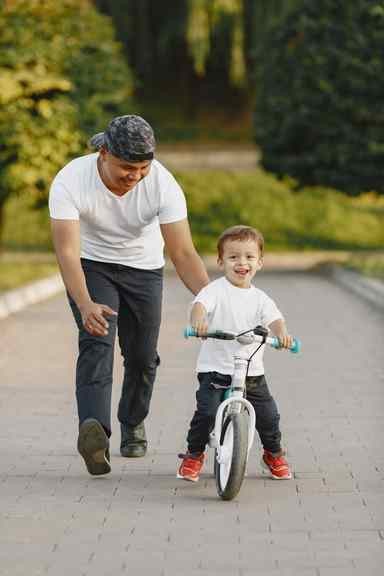
How to Teach Small Children to Ride a Bike
One of the best ways to get your kid into Biking is by starting them on a bike they can control. Here are the steps you need to take to teach your child how to ride a bike safely and effectively.
1. Remove the Pedals to Teach how to Balance the Bike
Several ways exist to teach a child to ride a bike. The first way is to remove the pedals from the bike and let them ride with their feet on the ground and back slightly bent.
Children usually find this method easier since they better maintain balance this way and can stay upright longer. Once they are comfortable riding this way, they can add pedals back to the bike and start learning how to control it.
2. Leave Crank Arms
The most important step when teaching kids how to ride a bike is that they feel comfortable with the bike and its controls. In other words, let them operate the pedals and crank arms on their own as much as possible.
3. Adjust Seat Height

You can adjust the seat height if your child is too short to reach the handlebars. As a result, the saddle will get raised, so the child’s feet will be at or near the pedals. (Check out our blog post, “How to Teach a Kid to Ride a Bike,” for tips on adjusting the seat.)
4. Sit & Walk
The ability to ride a bike is essential to a child’s development. To get them going, you need to do a few things. Start by having them sit on the bike and hold onto the handlebars.
Next, take them around the block a few times, so they get used to the bike’s feel and movement. You can start teaching them how to ride as soon as they learn how to balance themselves and pedal.
To keep your child safe while riding a bike, teach him or her how to apply a break to avoid being hit by a car or getting severe injuries.
5. Don’t Rush Pedals Installation
It is essential to keep patience when teaching a child to ride a bike. Ensure they are comfortable with the bike before you start pedaling. Allow them to become accustomed to the bike’s controls and feel. They should be allowed to practice at their own pace and should not be rushed.
6. Put Pedals Back On
As soon as your child has mastered balance on a bicycle, it is time to teach them how to ride and accelerate with enough momentum.
The next thing to do is reattach the pedals to the bike. It is usually done by threading one end of the pedal on the axle and the other end on the bike. Ensure that the pedal is tight against the frame and the axle. This may require a wrench. Also, avoid riding in rough places.
7. Raise the Saddle of your Child’s Bike
Once you’ve attached the pedals, you’ll need to raise the saddle. As a guide, here’s how to raise the saddle:
- To adjust the saddle height, remove or insert the Allen key (or a similar tool) from the bottom bracket and keep turning it until the saddle is correctly positioned.
- Loosen the bolts that secure the saddle to the bike frame.
- Lift up on the saddle and swing it to the side, then lift it off of the frame.
- Reinstall the bolts and tighten them using a wrench by putting the saddle on a level surface.
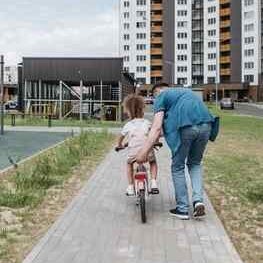
8. Encourage your Child to Sit and lean Forward
Encourage your child to lean forward as they ride the bike. Keep your hands on their hips while training wheels. This point will better help them understand how much to lean and when to come in the stopped position. Also, ensure that their shoulders are relaxed and seated correctly.
9. Carefully Place their Feet on the Pedals
Proper pedal placement is essential when teaching a child to ride a bike. It will train them how to pedal and master the bike. To place their feet flat on the pedals, get them to stand facing the bike and form a straight line with their feet shoulder-width apart.
Until they are seated, place their hands on the handlebars and press down on the pedals with their heels. In most bicycles, a toe clip or band around the pedal helps children place their feet correctly. Parents can use tape for bikes without toe clips to keep their children’s feet in place.
10. Tell them to start moving slowly
When they are comfortable with the pedals, push them forward slightly slowly at first, and then increase enough speed. The vast majority of cyclists do not keep their knees bent and back straight while learning to ride. So, remind them of this essential learning process.
What are the Benefits of Riding a Bike
There are various benefits of bike riding for both adults and children. A few of them are listed below:
- Biking helps you burn more calories than a simple walk, which ultimately helps you lose extra pounds.
- Riding a bike can be fun. If you don’t enjoy biking alone, consider taking your little one out for a ride. This can make them happy and improve their fitness at the same time. Remember to start kids with the pedal-less bike if they are too small.
- Biking is an environmentally friendly activity. Aside from being good for your health, biking also saves you gas and parking lot money.
- Bicycling can help you stay safe. Just keep your eyes on the road. Come in a stopped position and keep your pace slow if you notice something dangerous. Also, try not to skid because this abrupt action can hurt you.
- Bicycling can be a great way to build community. If you’re new to your city, biking can be an easy way to meet people and get to know your neighborhood.
- Bicycling can be a great mode of transportation for people with disabilities. They can be easily fitted with wheelchairs and other mobility devices, making them accessible to many people. But before making a purchase, take some advice to buy from a brand that promises a lavish experience.
- Bicycling can be a fantastic way to reduce stress and anxiety. Basically, it improves your mental health by clearing your head, training your legs, and calming your body.
- Bicycling can help you reduce your carbon footprint. Riding a bike instead of driving your car can also help you save on gas and reduce the pollution you produce before it gets too late.
- Bicycling is also a superb way to hang out with friends and make your own lifetime moment.
How to ride a Bike safely
Learning how to ride a bike is essential if you’re unfamiliar with it or new to the sport. Below below-mentioned steps will show you everything from getting on and off your bike safely to taking turns, stopping, and other excellent tips to prevent falling.
1. Pick a Wide and Open Place to Ride
You should begin by finding a safe, sound, and big place to ride. A street with ample sidewalks can be your best bet to start practicing. A bike path or sidewalk may be more suitable if you live in an area with smaller streets and fewer sidewalks or if you are just getting started.
Make sure the bike path or sidewalk is well-maintained and free of obstacles before choosing it. Additionally, obey all traffic laws when you learn to ride. For example, use pedestrians when crossing on the main highway.
2. Turn with Ease
As soon as you get on your bike, turn your body in the direction in which you want to go. Stand with one foot next to the wheelbase (the middle of the bike), then grasp the handlebar with your other hand. If your bike’s frame has a front wheel lock, insert it into the front hub (if it doesn’t have a lock, do not use it).
Now twist the handlebar to the left or right until the bike shifts into gear. Release the handlebar and step off the bike when you’re ready to ride.
3. Stop Bike with Technique
To get off your bike, first, come to the stopped position and then gradually stop pedaling. Then dismount by putting your left foot on the ground next to the second pedal and slowly pulling your right hand off the handlebar. Don’t let your wheels catch on you while you’re off your bike; they can be dangerous.
Bike riders should be aware of their surroundings at all times. Stop and assess the situation if you see someone or something that makes you feel unsafe. If necessary, call a friend or family member for safety purposes.
Lastly, remember that biking is fun, so enjoy your ride and wear your knee pads, elbow pads, and other important gear to avoid any injury.
4. Right Gears
When you ride, you need the right gear to ensure your safety, especially if you are a beginner. Helmet, elbow guards, knee guards, and comfortable clothing all are important. So, make sure you wear them whenever you ride.
Conclusion
Biking is a great way to get exercise, improve your fitness level, and get to know the world around you. Check out our step-by-step guide to learn how to start biking if you struggle to learn it independently. Navigate different routes until you find one that is just right for you.
And finally, start pedaling. The more time you spend practicing pedaling, the better cyclist you will become. Thanks for reading.
Please share your thoughts and feedback on the article in the comments section. Please like, share, and follow our Facebook Page, and keep visiting our website for more guides like this.
How to Ride A Bike — Frequently Asked Questions
What is a Good Distance for a Beginner Cyclist?
Beginners should aim to ride between three and five miles each day. But this can be tough for many kids to achieve, so they can aim for two miles daily.
What is a Good Time to Start Biking?
Biking can be done anytime, but adequate warming up is a good idea before you begin.
What is the Best Biking Route for a Beginner?
For a beginner, the best biking route is one that is smooth, flat, and has few hills. It will help you learn how to master your bike and make gradual adjustments.
What is the Purpose of Cycling?
The purpose of cycling is to provide transportation. Additionally, it will enhance your balancing skills and will keep you fit in the long run.
What is the Best Biking Time for a Beginner?
Beginners should cycle for at least 30 minutes to 1 hour.
What Does a Beginner Cyclist Need?
A beginner cyclist needs the same equipment as any other cyclist: a bike, helmet, gear, and clothes. Beginner cyclists also need training wheels or a child’s bike to start.
How Long Does it Take to Learn to Ride a Bike as an Adult?
Learning how to ride a bike in as little as 30 minutes is possible, but it can take more time or effort if you are not used to riding a bike. For some people, learning how to ride a bike can take days or weeks.
Related: