Whether you’re a seasoned cyclist gearing up for a nighttime adventure or a city commuter looking to improve your safety during those early morning rides, a reliable bike light is an essential component of your kit.
Choosing the right bike light can be the difference between a safe, clear ride and one that’s potentially risky. Before making a purchase, it’s crucial to understand the important factors that contribute to a good bike light.
This guide will help you navigate the sea of available options, ensuring that you equip your bike with a light that will serve your needs best, illuminate your path effectively, and enhance your safety on the road.
What are Bike Lights

Bike lights are essential safety devices that cyclists use to increase their visibility on the road, especially during low-light conditions or at night. They help make the cyclist more visible to other road users, including motorists, pedestrians, and other cyclists, reducing the risk of accidents and improving overall safety.
Best Bike Lights — Quick Summary
We understand that you might be pressed for time. In case you do not want to read through the post and are willing to take our word then here is our top pick for the best bike lights.
No products found.
When Bike Lights Get Used
Bike lights are used in various situations and conditions to enhance the visibility of cyclists and promote their safety on the road. Here are some common scenarios when bike lights are used:
1. Low-Light Conditions
Bike lights are essential during low-light conditions, such as at dusk, dawn, or during foggy or rainy weather. In these situations, visibility can be significantly reduced, making it harder for motorists and pedestrians to see cyclists. By using bike lights, cyclists increase their visibility and reduce the risk of accidents.
2. Nighttime Riding
When riding at night, bike lights are crucial for both the cyclist’s visibility and the ability of others to see them. The darkness of nighttime poses increased risks, and having proper lighting allows cyclists to navigate the road, identify hazards, and make themselves visible to others.
3. Urban Environments
In urban areas with heavy traffic, bike lights are essential for cyclists to be seen by motorists and pedestrians. Even during the day, when there is ample light, bike lights can improve visibility in crowded and complex traffic situations.
4. Rural and Unlit Roads
When cycling on rural roads or areas without street lighting, bike lights become even more crucial. These areas often have less traffic and reduced visibility, making it important for cyclists to have sufficient lighting to see the road ahead and be seen by any approaching vehicles.
5. Tunnels
When riding through tunnels, especially those with limited or no natural light, bike lights are vital.
Types of Bike Lights Available Today
There are several types of bike lights available on the market, each serving different purposes and catering to specific needs. Here are the most common types:
1. Front Lights
Front lights are mounted on the handlebars or the front of the bike, facing forward. They illuminate the road ahead, allowing the cyclist to see any obstacles or hazards in their path.
Front lights are typically white or yellow in color and provide a focused beam of light. They should be bright enough light to illuminate the road adequately but should not blind oncoming traffic.
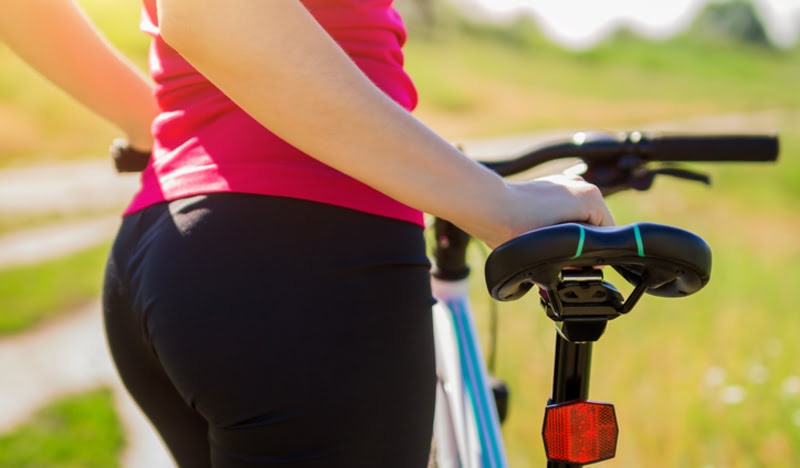
2. Rear Lights
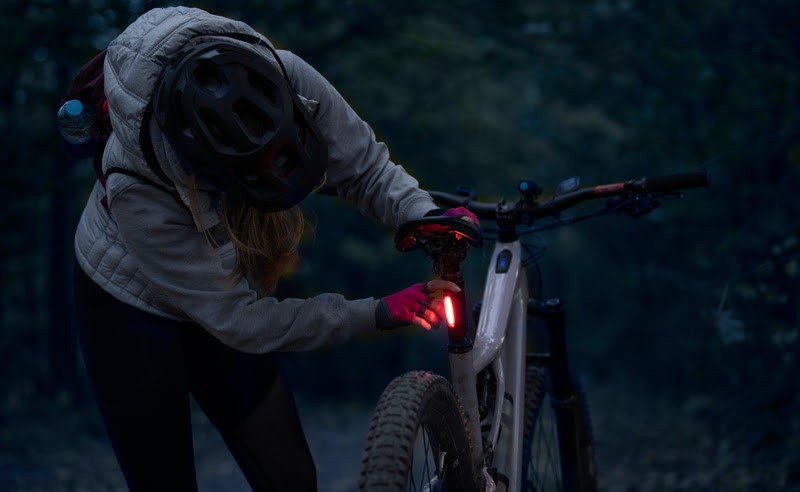
Rear lights are attached to the seat post or rear frame of the bicycle, facing backward. These lights emit red or amber light and are primarily used to make the cyclist visible to vehicles approaching from behind.
Rear lights may have various modes, such as steady light or flashing, to attract attention and improve visibility.
3. Combo Sets
Combo sets include both front headlights and rear tail lights in a single package. These sets are convenient as they provide a complete lighting solution for both the front and back of the bike.
Combo sets are often designed to work together seamlessly and may offer additional features like synchronized or programmable lighting patterns.
4. Helmet Lights

Helmet lights are compact lights that can be attached to a cyclist’s helmet. These lights provide an extra level of visibility as they are positioned higher, making the cyclist more noticeable to drivers and pedestrians.
Helmet lights can supplement the bike’s primary lights and provide better visibility in the direction the cyclist is looking.
5. Wheel Lights/Spoke Lights
Wheel lights, also known as spoke lights, are small LED bike lights that attach to the spokes of the bike’s wheels. They create a decorative and eye-catching effect, enhancing side visibility. While they are not as bright as headlights or taillights, wheel lights can add an extra element of visibility and style to a cyclist’s bike.
6. Reflectors
Although not technically lights, reflectors play a vital role in bike safety. They are often built into the bike’s frame, pedals, wheels, and handlebars. Reflectors work by reflecting light back to its source, making the bike visible from different angles. They are particularly useful when illuminated by headlights from other vehicles.
Legal Requirements and Safety Standards for Bike Lights
Understanding Local Regulations for Bike Lights
It is essential to be familiar with the local regulations regarding bike lights in your specific area. These regulations may vary from one jurisdiction to another. Some common requirements or recommendations regarding bike lights include:
1. Required Lighting
Many jurisdictions have laws that mandate the use of bike lights during certain hours, such as at night or during low-light conditions. The specific requirements may include using white or yellow front lights and red rear bike lights, both visible from a certain distance.
2. Light Placement
Local regulations may specify where the lights should be mounted on the bicycle. For example, the front light is typically mounted on or near the handlebars, and the rear light is mounted on or near the seat post.
3. Light Brightness
Some areas have regulations regarding the minimum brightness level of bike lights. These requirements ensure that lights are visible from a sufficient distance and enhance the cyclist’s visibility to others.
4. Flashing Lights
Some jurisdictions allow or even require bike lights to have a flashing mode. Flashing lights can attract more attention and increase visibility, especially in urban environments with high levels of visual distractions.
5. Reflectors
In addition to bike lights, local regulations may require or recommend the use of reflectors on the bike.
It’s important to check the specific regulations in your area, as they can vary significantly. Local transportation departments, law enforcement agencies, or bicycle advocacy organizations are good resources to consult for accurate and up-to-date information on local bike light regulations.
Safety Standards and Certifications to Look For
When purchasing bike lights, it’s advisable to look for products that meet recognized safety standards and certifications. These standards ensure that the lights meet certain performance and safety requirements.
Some common safety standards and certifications for bike lights include:
1. StVZO
StVZO (German Road Traffic Licensing Regulations) is a German standard for bike lights. Lights that comply with StVZO standards are designed to provide adequate lighting while minimizing glare for other road users.
2. ANSI FL-1
ANSI FL-1 is an American National Standard that specifies testing and labeling requirements for bike lights. It covers aspects such as max light output, beam distance, run time, water resistance, and impact resistance.
3. CE Marking
The CE marking indicates that a product meets European Union safety, health, and environmental protection requirements. While not specific to bike lights, it demonstrates compliance with certain European standards.
4. UL Certification
UL (Underwriters Laboratories) certification is a safety certification for various products, including bike lights. It ensures that the product meets safety standards and has undergone rigorous testing.
Recommended Light Setups for Various Conditions
The appropriate light setup for different cycling conditions can vary. Here are some general recommendations:
1. Urban Cycling
In urban environments with street lighting, it’s often sufficient to have moderately bright front and rear lights. Choose lights with a wide beam angle to enhance your lateral visibility to drivers at intersections.
Flashing modes can be particularly useful for catching the attention of drivers amidst urban distractions.
2. Off-Road Cycling
Off-road cycling requires more powerful lights to illuminate the trails and identify potential obstacles. Consider using a high-powered front light with a long beam distance. A helmet-mounted light can provide additional flexibility and direct light where you’re looking.
3. Commuting in Mixed Conditions
For commuting in mixed conditions, such as transitioning from daylight to low-light or dark conditions, a moderate front light combined with brighter lights in the rear is recommended. This setup ensures you’re visible to others while also allowing you to see the road ahead in lower light conditions.
Things to Consider While Choosing the Right Bike Lights
1. Decide the Lumens You Need
Lights for the bike generally fall into two categories: those that provide ample lighting for clear visibility of your path and those designed to ensure you’re visible to other road users. They are broadly categorized as bicycle lights for seeing and bicycle lights for being seen.
The light intensity of a bike light is commonly specified in lumens, which is a unit used to quantify the total light output from a source. As a result, the lumen rating of light often serves as a key specification because a higher number implies that the light will be brighter.
However, some bike lights, typically dynamo-powered headlights and StVZO-compliant battery-powered lights, state their power in lux, a unit that measures the amount of light cast on a surface.
Cyclists who mainly ride in well-lit urban areas, where there’s no need for lights to brighten the path ahead, might only require a light with a few hundred lumens. However, if your journeys take you on unlit roads or trails, this won’t suffice, necessitating a more potent light.
For city commuting, a bike light with around 200 lumens should be ample. For unlit roads, I recommend a front light with at least 400 lumens.
Don’t fall into the trap of believing that the lumen rating is all that matters. A high-intensity light with a battery power that can only sustain the advertised output for a short period won’t be much use, especially if you frequently need the highest power setting for prolonged rides.
Make a point to inspect the reported battery lifespan at each power level to identify the most suitable light for your biking habits.
2. Battery Life
The most luminous light for bikes may only be ideal for you if it sustains your typical ride duration. Although you can’t always foresee when a ride might transform into an unplanned adventure, lights that comply with the ANSI FL-1 standards should provide a reliable prediction of battery life.
This would enable you to select a suitable light that covers your commute and possibly a bit more, as per your requirements.
3. Balance and Beam Pattern
When shopping for a set of bike lights, it’s prudent to consider the balance between the front and rear lights. The front light is usually more powerful, as it is responsible for illuminating dim roads and cycling paths.
Despite most rear lights not matching the lumen output of the front ones, their specification is equally crucial.
The primary function of a rear light is to enhance your visibility to other road users. Therefore, it’s vital that it has sufficient brightness and battery life to endure the entirety of your ride while also being potent enough to be seen from a considerable distance.
Some bike lights are now being marketed for daytime use, offering adequate brightness and flash patterns to ensure you’re visible even in broad daylight and low-light conditions.
Both front and rear lights should achieve a balance between reach and peripheral illumination. While a tightly focused beam is excellent for lighting the path ahead during high-speed rides, it’s also important for spotting hazards and increasing visibility to other road users approaching from various angles that part of the light beam expands to the sides as well.
4. Secure Mount
A bike light that subtly or abruptly shifts downward can be ineffective when you need to illuminate the path ahead. Bike mounts have significantly improved since my initial testing in the past, but some models are still better than others.
I discovered that the most robust mounts were often the most challenging to install initially, however, the optimal ones featured quick-release mechanisms that made detaching and reattaching the light’s body effortless.
5. Water Resistance
Bike lights require at least IPX4 or IP64 waterproof ratings (resistant to water splashes from all directions) on the basis that only a minority of commuters require a light that operates underwater. However, if you reside in an area with heavy rainfall, I recommend a light with an IP rating that ends with the number 7 (signifying it’s waterproof).
As a quick refresher, “IP” denotes “ingress protection”. The last digit in each rating refers to the moisture protection level, while the first digit or letter signifies the protection level against dust. For example, the “X” in an IPX4 rating indicates the manufacturer didn’t seek certification for dust protection; this doesn’t necessarily mean the product isn’t dust-resistant.
6. Budget Considerations
While it’s possible to spend upwards of $250 for high-intensity rechargeable bike lights, it’s not a necessity. I’ve found quite a few exceptional lights in the $60 bracket.
Furthermore, you can find a suitable light for as little as $35, offering a decent battery life, ample lumens for safe city navigation, and a reliable mount.
Those with longer and darker commutes might choose to invest a bit more for extended battery life, a broader beam, a robust mount, superior waterproofing, or a combination of these.
7. Side Cutouts or Lights
Bike lights that feature cutouts or extra LEDs on the sides of a headlight offer improved visibility from a variety of angles, compared to lights that just have a single broad beam.
This is crucial, as according to 2019 data from the National Highway Traffic Safety Administration, 70% of automobile-bicycle accidents and 27% of resulting fatalities occur at intersections.
8. Battery-Life Indicator
A simple mechanism to inform you when it’s time to charge the light can be helpful. Most of the lights I tested have an LED indicator located on or near the power button, which turns red when the remaining charge is between 20% and 25%.
The most useful battery indicators are color-coded green, yellow, and red to provide an accurate gauge of remaining battery life.
9. Daytime Visibility
While it’s not definitively proven that daytime running lights can prevent accidents, it’s hard to overlook the striking impact that certain lights’ daytime modes can have when witnessed firsthand.
I discovered that light with approximately 200 lumens was sufficiently bright to be discernible in daylight, and flashing modes were more noticeable than constant or pulsating modes.
10. Flash Patterns
Having a solid-beam mode to illuminate the road ahead is crucial, but I also considered flashing modes intended for daytime use. All the headlights I tested featured flashing modes for daytime operation.
Additionally, I observed an emerging trend of headlights that combine a continuous, always-on beam with a simultaneous flashing pattern. This combination aids both visibility and being seen at night in urban settings, where bike lights vie with street lights, residential lighting, LED advertisements, and other light pollution sources.
11. Extra-Wide Beam
One of the primary reasons for choosing a dedicated bike light over a flashlight holster is to benefit from a wide-angle beam that mainly projects its brightness onto the ground ahead.
This feature allows you to see the road ahead without unnecessarily dazzling oncoming traffic or wasting light on the overhead trees.
12. Last-Mode Memory
Having multiple modes adds versatility but can be irritating when you need to cycle through numerous settings to reach the desired one. Fortunately, most lights are designed to remember and automatically return to the last-used mode, sparing you this task each time.
13. Lock-Out Mode
If you often remove your light when not in use, a light with a lock-out feature might be worthwhile, as it prevents accidental activation in your bag. Bike headlights, particularly high-powered ones, can become exceedingly hot when switched on in a confined space.
Although most of the lights I tested have built-in cooling fins, these are ineffective without the airflow generated while riding.
14. Overheating
As bike headlights become more powerful, they also tend to generate more heat. Activating the lock-out mode on any light to conserve the battery while not in use is always wise, but it becomes essential as the lumen output approaches or exceeds 1,000.
Most high-lumen headlights incorporate thermal management systems, which automatically reduce light output to safeguard the electronics. However, many of these lights can still become warm to touch when stationary.
The most efficient thermal management systems decrease the light output so subtly that it’s hardly noticeable, while less efficient ones may shut off abruptly without warning.
How to Maintain Bike Lights in Top Condition
Maintaining your bike lights in optimal condition is crucial for your safety and visibility while riding. Here are some tips:
1. Regular Cleaning
Clean your bike lights regularly to ensure they are free from dirt and grime that can dull the brightness. Use a soft cloth and mild detergent, being careful not to scratch the lens.
2. Battery Care
Recharge your lights promptly after use. For rechargeable batteries, don’t let them discharge completely before recharging. This can help extend their lifespan. If your light uses replaceable batteries, make sure you replace them regularly.
3. Storage
When not in use, store your bike lights in a cool, dry place to prevent damage from humidity and temperature changes.
4. Regular Checks
Make a habit of checking your lights before each ride. Look for any cracks in the casing or lens, and make sure they are securely mounted.
5. Avoid Overheating
Bike lights can get hot, particularly when used in high settings for extended periods. When possible, use lower settings to prevent overheating, which could damage the light’s components.
6. Water Damage
Even if your lights are water-resistant or waterproof, you should still dry them off after riding in the rain to prevent any potential water damage.
7. Handle With Care
Although most bike lights are designed to be sturdy, they can still be damaged from drops or impacts. Handle them with care to avoid unnecessary damage.
Remember, the better you care for your bike lights, the longer they will last and the better they will function. Regular maintenance also provides an opportunity to spot any issues before they become serious problems.
Best Front Lights for Bikes in 2026
1. Lezyne Macro Drive 1300XXL
No products found.
The Lezyne Macro Drive 1300XXL stood out due to its extensive features, affordable price, and stellar performance in both laboratory and real-world conditions. With a 2.5-hour runtime at maximum brightness during my lab test, it excelled, making it useful for deep woodland rides.
After 30 minutes into my lab testing, the Macro Drive maintained an output of over 1,000 lumens, representing only a 17 percent drop from its claimed peak output of 1,300 lumens.
The Macro Drive employs a short, oval-shaped beam pattern, functioning akin to a spotlight but dispersing more light laterally. It’s a versatile light offered at a very reasonable price. The only drawback of the Macro Drive is its weight.
At over 200 grams, it becomes noticeable on the helmet, particularly during rides exceeding an hour.
2. Lezyne Hecto Drive 500XL
No products found.
With its 500 lumens, the Lezyne Hecto Drive XL provides sufficient light for a reasonable pace on dark bike paths. However, with only an hour of runtime at maximum output, the Hecto is best suited as a city light.
It charges rapidly, remembers the last mode you used (which is more convenient than you might think), and features a total of eight flashing and constant modes, with advertised runtimes ranging from one to 20 hours.
Moreover, the Hecto is a compact device, easily attached to your handlebar with a simple rubber band.
3. Knog PWR Road
No products found.
Knog’s innovative PWR system, which revolves around a central power pack available in various capacities, was met with considerable enthusiasm upon release. The PWR range also includes compatible camping lights, Bluetooth speakers, and more.
My testing revealed that the PWR system is remarkably straightforward to use. Additionally, the battery life is quite commendable for a medium-powered light.
Best Rear Light Set in 2026
1. Exposure TraceR DayBright Rear Light
No products found.
Composed of an aluminium casing, a single lens, and an LED, the Exposure TraceR DayBright is a simple yet highly efficient design. It fits securely into a robust plastic bracket.
The TraceR’s bulb fully utilizes its 75-lumen maximum output, spreading the beam over 180 degrees to ensure visibility to other road users.
It can operate for three hours in high-power mode and for the entire day in lower settings, which are more than sufficient for nighttime use. The process of switching between modes is intuitive.
2. Topeak Redlite Aero 1W
No products found.
While Topeak’s Redlite Aero 1W may not seem extraordinary based on specifications, it consistently proves to be reliable and ready for action, never letting us down during a ride.
It offers four modes with a maximum output of 55 lumens, supporting a runtime of two hours, and features a low-battery indicator. It comes with varying back pieces and bands to fit diverse tube/post shapes, and the single LED strip is angled. Moreover, it can be fully charged in two hours.
3. Lezyne Zecto Drive Max
No products found.
Featuring a versatile clip mount suitable for straps or tubes and a solid build, the ZDM is a clear standout for bike-packing. It provides eight modes with a peak of a 250-lumen daylight flash, supporting a nine-hour runtime.
Although it’s light at 69g, its lateral visibility is somewhat limited. It also lacks a waterproof rating, so I’ve subjected it to a water spray without encountering any problems.
Best Light Set for Bikes in 2026
1. Blackburn Luminate 360 Light Set
No products found.
The Luminate 360 set from Blackburn enhances their already popular Dayblazer 400 and Dayblazer 65 front and rear lights by adding two sidelights. These can be attached to the fork, downtube, or top tube, proving particularly beneficial when crossing intersections, allowing drivers beside you to see you before turning right.
The Dayblazer 400 headlight remains unchanged, offering four modes to select from, ranging from 200 to 400 lumens with run times of 10 hours and one hour, respectively.
The Dayblazer 65 taillight can provide up to six hours of illumination at 35 lumens or 1.6 hours if operated in the 50-lumen solid mode. All four lights are attached via rubber straps and can be recharged using a micro-USB cable.
Conclusion — Bike Lights
Whether it’s the strength of illumination, battery life, durability, or mounting options, each factor has its significance. Take the time to consider your requirements and evaluate the various options available.
Investing in a good quality bike light will not only light up your path but also safeguard your journeys, both day and night. Remember, your safety on the bike comes first, and a reliable bike light is a major step in that direction.
Bike Lights — Frequently Asked Questions
Where to Mount Your Bicycle Lights?
While most headlights attach to the handlebar, certain models also offer the option for helmet-mounted light. Mounting on the handlebar is often the preferred first choice, given its stability and the fact that it doesn’t rely on a tightly fitted helmet for consistent lighting.
Helmet mounts are more suitable for bike lights for night riding. Especially for mountain bike rides when you might need the light to follow your line of sight, such as around a bend, rather than just illuminating where the bike is headed.
A helmet mount can also serve as an effective secondary location if you use two headlights. The different beam patterns from varied positions can fill in shadowed areas and provide more balanced lighting.
Do You Need a Rear Light Only or a Full Set?
In terms of safety and practicality, a full set of lights is generally the best choice, especially for those who regularly ride in the dark or in heavily trafficked areas.
Front lights serve two purposes: they illuminate the path ahead for the cyclist and make the bike visible to oncoming traffic. Rear lights, on the other hand, ensure you are seen by vehicles approaching from behind.
If you predominantly cycle during daylight hours or on well-lit routes, a rear light might be sufficient, primarily to increase your visibility to traffic coming from behind. However, remember that conditions can change, and having a front light available could become useful unexpectedly.
Is Brightness All That Matters?
No, brightness is not the only factor that matters in a bike light. While brightness is important for visibility, other factors such as beam pattern, visibility angles, battery life, durability, and ease of mounting are also crucial.
Considering these factors, along with brightness, will help ensure a safer and more effective lighting solution for cycling.
Are LEDs Good for Bike Lights?
The era of the filament bulb is thankfully over. Almost all of today’s top-tier front lights are equipped with Cree LEDs, which provide improved brightness, increased versatility, reduced heat, longer lifespan, and are more compact.
Most modern rear lights employ COB LEDs. COB stands for ‘chip on board’, which essentially means multiple LED chips combined into a single module. They generate less heat, are the brightest light, and can come in a range of colors.
However, it’s crucial to remember that in most countries, the law mandates that a rear light must emit red light.
Related: