A bicycle pump is a crucial and dependable maintenance tool that every bike owner should possess. This device comes in handy when your bike tires are deflated and you need to fill them with air. The majority of bicycle pumps available today are manually operated and necessitate basic repair know-how.
Being a consistent cyclist means understanding how to use a bike pump correctly to avoid damaging your tires. Consequently, I have put together a straightforward guide to help you learn the proper way to utilize a bicycle pump, ensuring your tires remain inflated and prepared for any road escapades.
This guide covers steps such as opening the valve, connecting the pump head and bike valve, applying the appropriate pressure, and much more. Continue reading for a comprehensive guide on how to inflate bike tires successfully.
What is a Bike Pump
Bicycle pumps are devices that require manual operation and are designed to inflate your tires. Typically lightweight, they can efficiently fill air into the tires within minutes. Operating most pumps is generally straightforward and user-friendly.
Our Top Picks for the Bike Pump
In today’s vast marketplace, making informed purchasing decisions can be challenging. Our curated list of top 3 bike pump picks helps you confidently navigate this complex landscape. Based on comprehensive evaluations, we’ve selected the best three bike pumps that align with your unique needs and preferences. Whether you’re a tech enthusiast, homebody, or outdoor adventurer, we’ve got you covered. Our top 3 picks represent innovation, quality, and satisfaction, ensuring you’ll find the perfect product for your cycling.
No products found.
How Bike Tires Hold Air
Have you ever wondered how air is held inside your tires? If you haven’t repaired a puncture before, you may not be familiar with the mechanism. The majority of bikes utilize an inner tube, which is a circular and airtight tube that fits inside the tire. It features a valve on the outer side for inflating the tube.
When the inner tube is inflated, the tire becomes firm and makes contact with the ground, providing grip and shielding against punctures.
You may have heard of tubeless tires, which eliminate the need for an inner tube. Instead, they rely on a special rim and tire combination to maintain an airtight seal. Tubeless tires often require the application of a liquid sealant that fills any gaps where air might escape.
While tubeless tires are more commonly used in mountain biking, they are gradually being adopted in road cycling as well.
The sealant used in tubeless tires also helps to seal punctures, and without an inner tube, the risk of pinch flats (when the inner tube gets pinched by the rim) is significantly reduced. Consequently, tubeless tires can be run at lower pressures, providing improved comfort, speed, and traction.
At the highest level of cycling, there are tubular tires available. These tires have the tube sewn directly into them, but they are rarely used outside of professional racing events.
A Bit About Tire Pressure
Maintaining the proper tire pressure is crucial as it not only affects the handling of your bike but can also pose potential dangers.
When tires are inflated to excessively low pressures, they are prone to premature wear. The sidewalls of the tire may flex excessively, leading to cracks in the casing and a fragile tire that could potentially result in a blowout.
Additionally, running on very low pressures increases the likelihood of punctures and even the risk of the tire rolling off the rim during high-speed cornering since the internal pressure is what holds the tire in place. This can cause damage to the rim, resulting in dents or cracks that may necessitate an expensive replacement.
Conversely, running tires at excessively high pressures can have explosive consequences, such as the tire forcefully detaching from the rim. Excessive pressure can also exert a compressive force on the wheel, potentially causing damage.
In terms of handling, low tire pressure compromises stability, causing the tire to squirm under load. This makes the bike challenging to control and leads to sluggishness and reduced speed. Conversely, excessively high tire pressure can reduce grip and create a harsh ride, leading to rider fatigue and impacting handling performance.
As a general guideline, the tire should be firm enough to prevent excessive deflection all the way to the rim while still providing some suspension effect. The advantage of pneumatic tires is that they offer a degree of comfort by not being excessively rigid.
Most tires have a recommended minimum and maximum pressure range printed on their sidewalls. It’s advisable to stay within these limits, as manufacturers have specified them for valid reasons. However, within these limits, there is room to experiment and find the pressure that works best for you.
Remember, maintaining appropriate tire pressure is essential for safety, tire longevity, and optimal bike performance.
What Valve Type does your Bicycle have
Before you begin inflating your tire, it’s important to determine the type of valve it has. The valve plays a crucial role in both retaining the air within the tire and facilitating the inflation or deflation process.
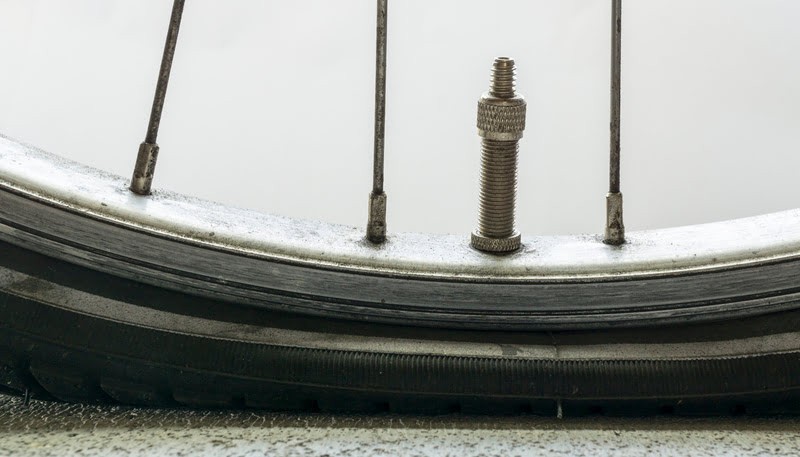
1. Schrader Valve
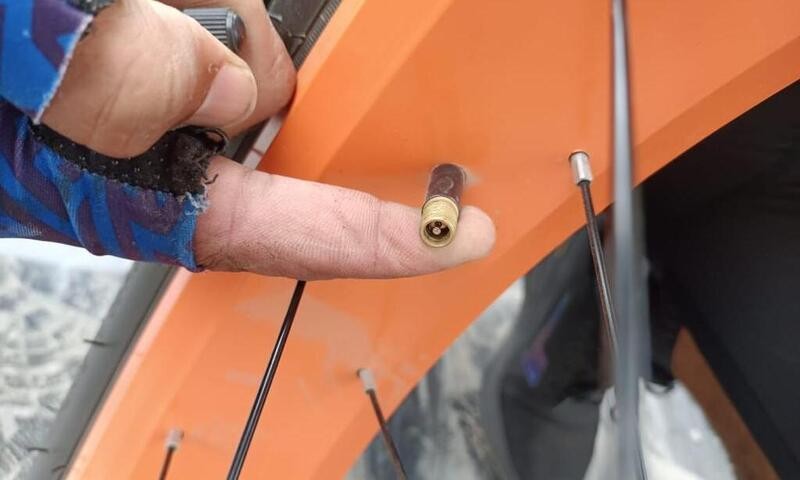
Schrader valves are commonly found on entry-level bicycles and, historically, on mountain bikes. These valves are also used for car tires.
The Schrader valve assembly consists of a hollow tube with a spring-loaded valve that automatically closes and screws into the external body. A pin extends upward from the valve, usually flush with the end of the outer tube. Depressing this pin allows air to be released from the tire.
The dust cap on Schrader valves plays a crucial role in the design by providing an additional seal if the valve is not completely airtight. It serves as a secondary “backup” seal. The spring mechanism of the valve makes it somewhat susceptible to contamination from dirt or grit, so it is important to take measures to protect it.
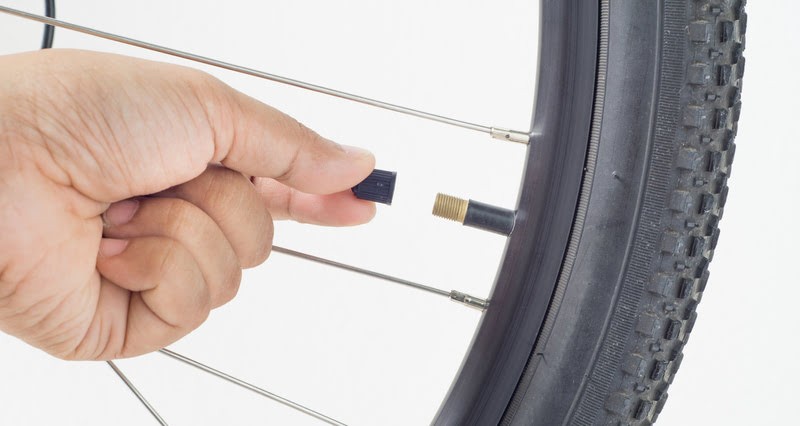
2. Presta Valve
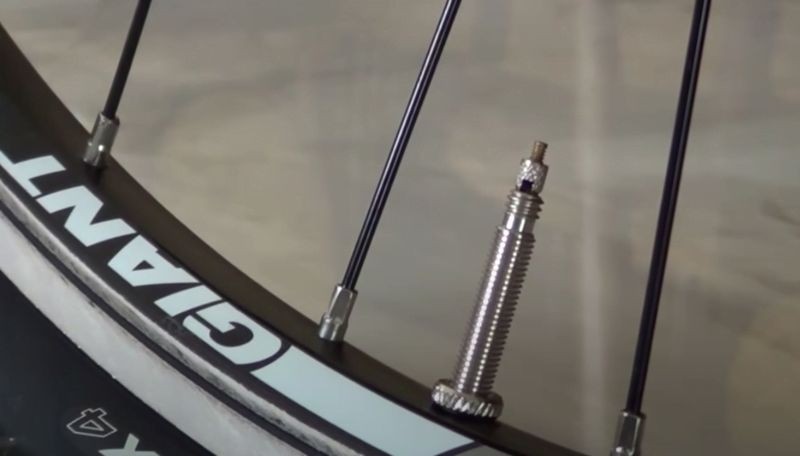
Presta valves are exclusive to bicycles and are commonly found on both road bikes and mountain bikes. They were initially developed for road bikes to accommodate narrower valve holes on slim road wheels, as Presta valves have a smaller diameter (6mm compared to 8mm for Schrader valves).
Unlike Schrader valves, Presta valves do not rely on a spring mechanism. Instead, they feature a nut that secures the valve in a closed position. The valve itself is designed to seal automatically when the pressure inside the tire pushes it shut.
To release air from a Presta valve, you need to unscrew the small locknut before pressing the valve pin. It’s worth noting that the locknut is secured to the valve body, preventing it from coming off.
There is a common misconception that Presta valves are better suited for high pressures, but this is not necessarily true. Schrader valves are capable of handling much higher pressures, exceeding what is typically required for bicycle tires.
However, it is important to handle Presta valves with a bit more care as they are slightly more delicate compared to Schrader valves. The threaded internal valve body of a Presta valve can be easily bent or broken if mishandled. Fortunately, valve cores of Presta valves can be replaced using standard tools, while Schrader valves often require a proprietary tool for this purpose.
Some Presta valves may include a lockring that secures the valve body to the rim, facilitating easier inflation. Although not essential for sealing, the dust cap for Presta valves helps to keep the valve clean.
3. Dunlop/Woods Valve
Another type of valve you might encounter is the Dunlop valve, also referred to as the Woods valve. It has a base diameter similar to a Schrader valve but can be inflated using the same pump fitting as a Presta valve.
Dunlop valves are particularly common on town and upright bikes in Europe and various other parts of the world. However, it is highly unlikely to encounter them in the UK or the US.
4. Tubeless Valve
For tubeless setups, the valves are directly attached to the rim instead of being a component of an inner tube. In most cases, these valves are of the Presta type, although Schrader valves designed for tubeless applications also exist.
How to Inflate Bike Tire (Schrader Type Valve)
If you are using a Schrader valve, the initial step is to remove the dust cap (if it is present) by unscrewing it in an anticlockwise direction. Next, attach the pump head to the valve.
Proceed to inflate the tire to a pressure within the range specified on the sidewall of the tire. Once the desired pressure is reached, remove the pump. Your task is complete!
How to Inflate Bike Tire (Presta Type Valve)
If your bicycle is equipped with a Presta valve, you will need to start by removing the plastic valve cap (if one is present) to expose another threaded cap on the valve.
Carefully unscrew the threaded cap, ensuring not cause any damage. Next, attach the pump head to the exposed valve and proceed to inflate the tire to a pressure within the range specified on the tire’s sidewall.
Once the desired pressure is achieved, remove the pump from the valve. Finally, close the valve by screwing it clockwise and securely reinstall the plastic valve cap.
Tubeless Considerations
If you are using a tubeless setup or have tubes with sealant inside, it is advisable to take additional precautions to prevent your pump from getting clogged. Start by turning the wheels so that the valves are positioned at the bottom. Allow a few minutes for any sealant present to drain out.
Next, rotate the wheels so that the valves are now at the top, and proceed to inflate your tires. The same principle applies when deflating the tires to avoid any sealant from spraying out uncontrollably.
A Step-by-Step Guide on How to Use Bike Pump
Mastering the use of a bicycle pump is a relatively simple process, and once you acquire this skill, you can easily keep your bike well-maintained.
In addition to the pump itself, there are a few other items that you should include in your toolbox. It is recommended to have a pump frame for convenient storage and transportation of the pump.
Equally important is to have spare valves readily available in your toolbox to address any valve-related issues that may arise.
Now that you’re familiar with the useful tools for inflating tires let’s proceed to the process of bike pumping.
How to Use a Bicycle Pump – Floor Cycle Pump Process
Here’s a detailed guide outlining the step-by-step process of using a floor bicycle pump to properly inflate your bike tires, ensuring they are ready for your next ride:
Step 1: Detach the Valve’s Dust Cover
To begin, let’s focus on the valve’s dust cover. It’s a little plastic piece that needs to be removed. By gently twisting it, it should easily come off. Just remember to keep it safe so it doesn’t get misplaced.
Step 2: Unseal the Valve (Applies only to Presta valves)
Next, let’s get into the second stage. If your bicycle is equipped with a Presta valve, it must be unsealed before you can pump in air. Don’t fret; it’s not complicated at all! Loosen the valve by unscrewing it a few times. If it’s a bit stiff, needle-nose pliers can help you get a better grip.
Once the valve is loosened, just press on the top briefly to release it. And there you have it! You’re ready to inflate your tire. You might also consider a valve adapter for a more precise fit with your Schrader bike tire pump.
Step 3: Connect the Bicycle Pump Nozzle to the Valve
Now we’re ready to connect the pump nozzle to the valve. Your floor pump should have two nozzle slots – one for a Schraeder valve and one for a Presta valve. Choose the appropriate nozzle and firmly press it onto the valve until it fits snugly.
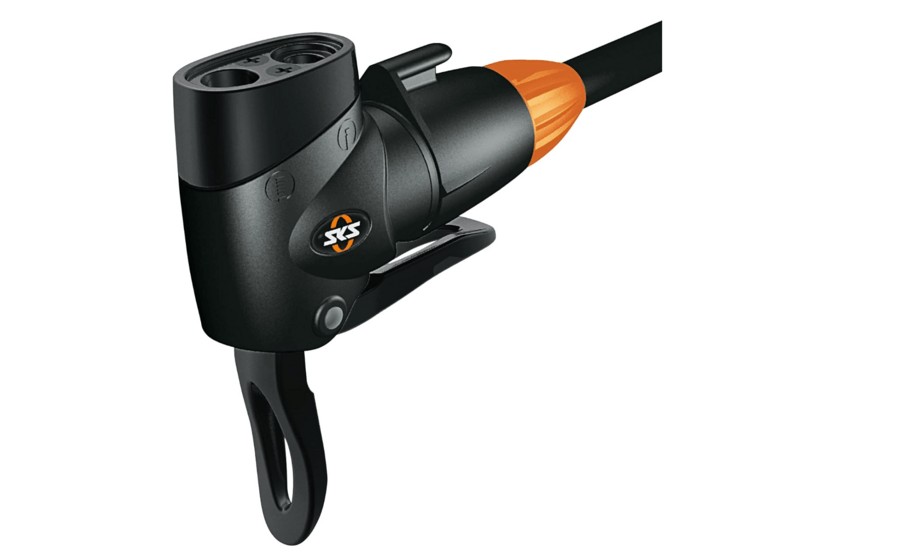
A slight release of air from the tire is completely normal, so don’t be alarmed. You’re just one step away from pumping!
Step 4: Activate the Pump Lever
Great work so far! Now let’s get the pump ready. You’ll notice a small lever on the pump that needs to be adjusted before you can start pumping. Typically, this lever needs to be pulled up to a 90-degree angle. Some advanced pumps might have a push-in lever, so always read the instructions if you’re unsure. With the lever set, you’re ready to inflate your tire!
Step 5: Inflate the Tire to the Correct Pressure
Let’s get pumping! Stand on the pump base with both feet and hold the handles with both hands. Begin the pumping action by pulling up and pushing down on the pump. Continue this until you’ve achieved the desired tire pressure, which can be checked on the air gauge. Don’t worry if it seems to be taking a bit of time – every pump brings you closer to your goal!
Step 6: Release the Pump Lever and Detach the Nozzle
It’s time to disconnect the nozzle from the valve. To disengage the pump, push the lever back down and then carefully take off the nozzle from the valve. A slight hiss of air escaping from the tire is normal, so don’t be surprised when it happens.
Step 7: Seal the Valve (Applies only to Presta valves) and Reattach the Dust Cover
Lastly, if you’re using a Presta valve, remember to reseal it by screwing it back tightly. And don’t forget to replace the dust cover that you initially removed from the valve. This is crucial to prevent dust and other debris from entering the valve.
How to Use a Bicycle Pump – Hand Bike Pump Process
A portable, handheld bicycle pump is an ideal addition to your toolkit for on-the-go convenience. To learn how to operate a handheld bicycle pump, follow these steps:
Step 1: Identify the Valve Type
The first step to using a manual bicycle pump is to determine the valve type. As previously mentioned, there are two kinds of valves, which are both relevant when dealing with your handheld bicycle pump.
Whether you’re using a Schrader valve or a Presta valve, knowing the correct technique will enable you to inflate any tire. It’s essential to identify the valve type to use it correctly.
Step 2: Inspect the Pump
It’s also crucial to understand the specifics of your handheld cycle pump. Make sure the pump is compatible with your valve type, or opt for pumps with adjustable head features for future versatility. If you’re uncertain, consult the user manual of your handheld bicycle pump.
Step 3: Connect the Pump to the Valve
Now, it’s time to link the handheld bicycle pump to the valve on the tire. The method of attachment will depend on whether you have a Presta or Schrader valve. For the Schrader valve, you’ll need to unscrew the plastic cap and let out some air. For the Presta valve, the nut must be removed first.
After this, you can secure the pump head to the valve, ensuring it is tight enough to prevent any air leakage.
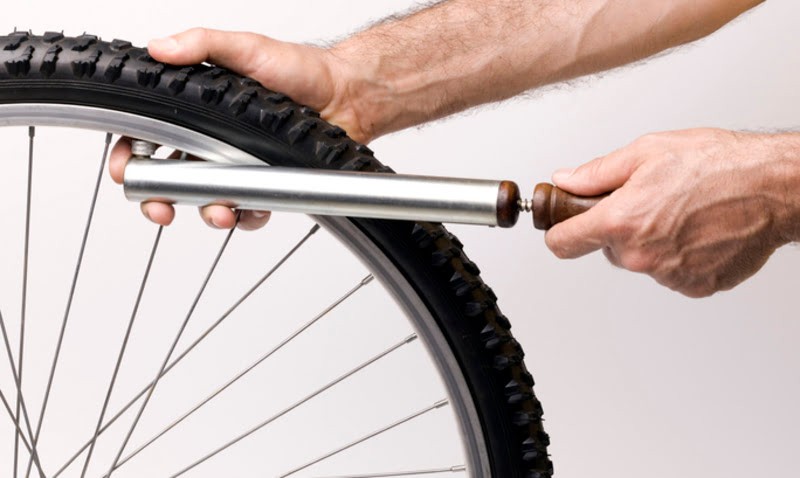
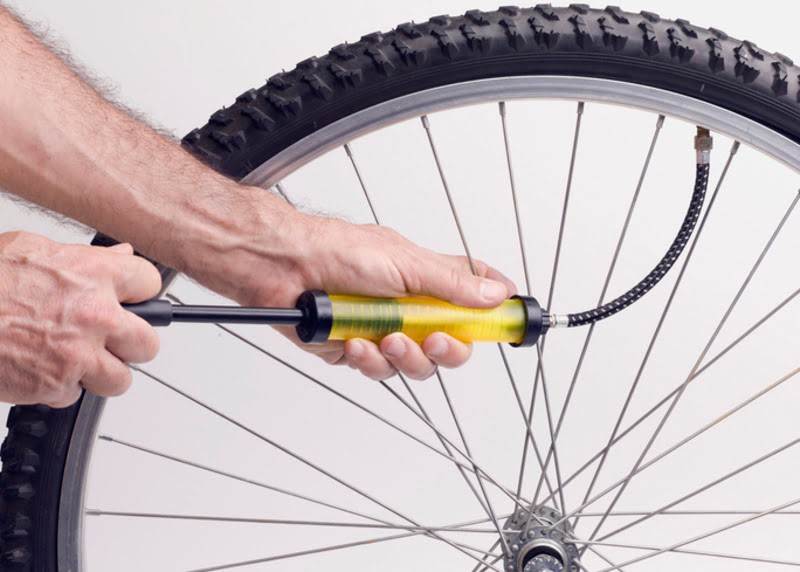
Step 4: Inflate the Tire
Once the handheld bicycle pump is securely attached to your tire, it’s time to put some effort into it. Grasp the pump with one hand while manipulating the pump handle with the other, using a push-pull motion. The tire will gradually inflate and will soon be fully inflated.
Tips & Advice
When maintaining your tire and inflating it, consider the following tips to avoid any damage:
1. Always review the details before purchasing or inflating a tire. You should verify the type of your tire’s valve and the kind of pump you’re using.
2. Exercise caution when inflating your tire to avoid straining a muscle or damaging the tire.
Factors to Consider when Choosing a Bicycle Pump
Pressure
Pressure is the primary consideration that should be given utmost attention when it comes to your tires. It is crucial to evaluate the specific requirements of your bike and determine the appropriate inflation pressure. For mountain bikes, a pressure of less than 40 PSI is sufficient. It is important not to exceed this standard PSI to prevent overinflating the tires.
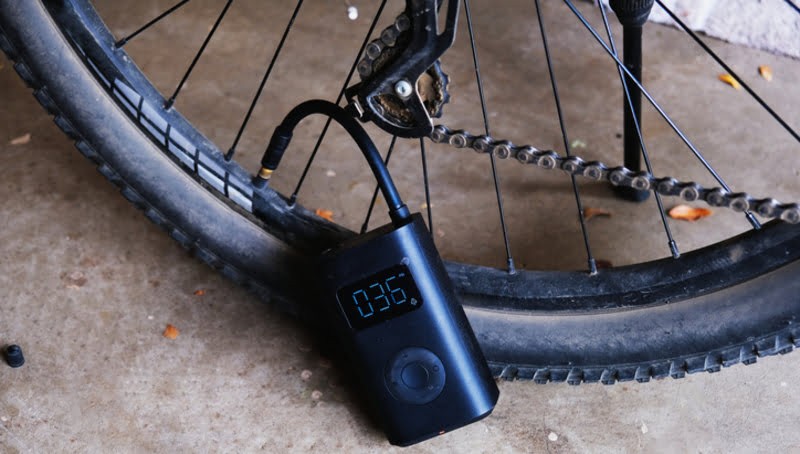
Gauge Accuracy
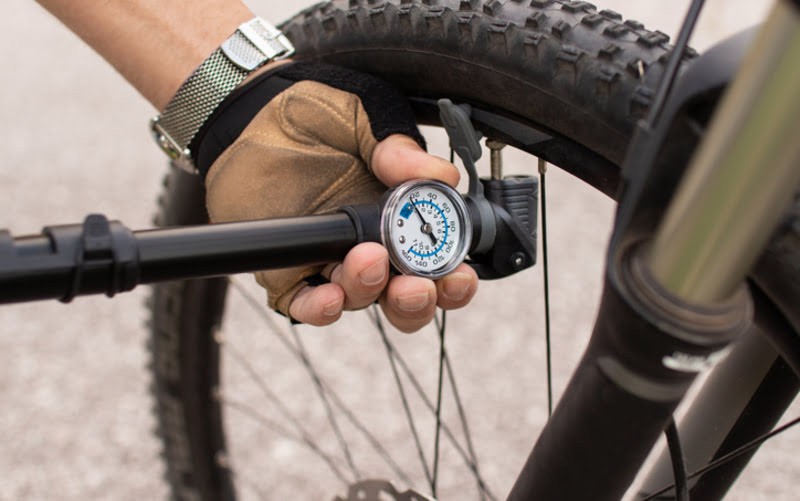
Ensuring gauge accuracy in a bicycle pump holds equal significance. It enables you to provide the precise amount of pressure required by your tire. By utilizing a clear and legible gauge, you can easily ascertain whether you are applying excessive or insufficient pressure to the tires. This practice plays a vital role in safeguarding your tires from long-term damage.
Pump Heads and Valves
Nowadays, bicycle pumps are designed to accommodate both Presta valves and Schrader valves. It is highly advisable to identify the specific valve type your tire requires to prevent any potential damage. There are various valve head styles available for consideration.
Options include the twin-valve head, smart head, and thread-on style head. The twin-valve head features two distinct slots, each suitable for a different valve type. The smart head offers greater versatility as it can automatically adjust to the valve size on one side. Lastly, the thread-on style head allows for customization, requiring flipping and changing to match the valve requirement.
Volume Output
Naturally, the volume output should be determined by the type of bike you own. Opting for a high-volume pump eliminates the need for excessive strokes to reach the desired tire pressure. For mountain bike owners, it is recommended to select a pump with a larger volume to meet the tire requirements.
In the case of tubeless tires, substantial volume output is necessary to achieve the desired tire pressure without relying on a compressor.
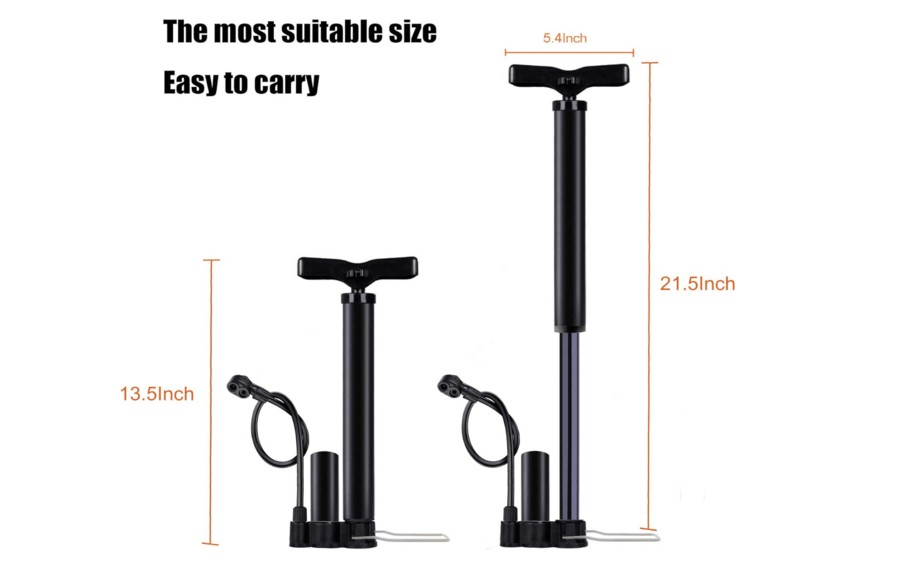
Size
Size is an additional aspect that should not be overlooked when selecting a bicycle pump. If you intend to use it solely for bicycles, it is advisable to opt for a hand pump, enabling you to have manual control over the pressure applied to the tire.
However, it is important to avoid choosing the smallest pump size, as although it can eventually inflate the tire, it would require more time and effort on your part.
Weight
The majority of bicycle pumps are designed to be lightweight. However, if you desire a heavy-duty and robust option, there are also such pumps available in the market. These models are more stable and less prone to toppling over.
It is worth noting, though, that lightweight pumps tend to be more expensive compared to their heavier counterparts. They are typically constructed using durable materials like aluminium or carbon fiber to ensure longevity despite their lightweight design.
Construction
Bike pumps are available in a range of constructions and prices, with the material used as a key determinant of cost. Among the options, metal stands out as one of the most durable materials utilized by manufacturers of bike pumps. Consequently, higher metal content in the pump generally results in a higher price.
A pump constructed with metal offers enhanced solidity, stability, and longevity, making it a reliable choice for long-term use.
Serviceability
When considering the purchase of high-quality pumps, it is important to prioritize serviceability. This entails ensuring that in the event of damage, there are readily accessible service centers capable of repairing the pump. Additionally, it is beneficial if the necessary components and spare parts are easily obtainable in the market.
What to do If Your Tire Isn’t Holding Air
If you have inflated your tire, but it is losing air, it indicates that you have a flat tire that requires repair. This typically means that either the inner tube inside the tire has a hole (the most probable scenario) or, in the case of tubeless tires, there may be a crack or a need for additional sealant.
If you’re willing to put in a bit more effort, replacing an inner tube is a simple task. You can visit a local bike shop to purchase the appropriate-sized tube or order it online.
Numerous YouTube videos are available to guide you through the process of changing a bike tube. However, if you prefer a hassle-free solution, you can have a bike shop to perform the task for a reasonable cost and in a short amount of time. If you’ve never repaired a flat tire before, it might be easiest to take it to a bike mechanic.
What to do If You Don’t Have A Pump At Home
If you find yourself with low tire pressure and lacking a pump, don’t worry! There are several options available to you. The most convenient choice is to visit a nearby bike shop. You can ask to borrow a pump or seek assistance in inflating your tire. In most cases, bike shops won’t charge you for this service.
Alternatively, you can seek out a community pump. These can often be found at trailheads, pump tracks, or entrances to bike paths and are usually accompanied by a tool stand. If your town provides a bike map, these pump locations are likely marked on it.
However, it’s worth noting that a significant number of these pumps may be out of order or not functioning optimally. Nevertheless, it’s still worth a try!
Finally, you have the option of using an air compressor at a gas station, although this can be a bit more challenging. Air compressors at gas stations provide rapid inflation, so you must exercise caution to avoid overinflating your tire. Additionally, if your bike has a Presta valve, you’ll need a valve adaptor to use the air compressor effectively.
Best Pump for Bikes Recommendation: Ensuring Efficient and Reliable Tire Inflation
1. Specialized Air Tool Comp V2 Bike Pump
Specialized, known for its excellent floor pump line, has now introduced one of the most intelligent models to date, the Air Tool Comp V2. This pump features a dual-range pressure gauge designed for versatility.
One half of the gauge caters to low pressures, displaying increments of one psi from zero to 30 psi, while the other half is tailored for high-pressure tires, showcasing increments of two psi from 30 to 120 PSI.
This design eliminates the need for a digital gauge and batteries, and it also simplifies your workspace by replacing the need for separate mountain bike and road bike pumps.
However, the gauge’s accuracy could be improved. I also found myself wishing for a bleed valve on the pump head. Despite these shortcomings, I still regularly use the pump due to its compatibility with a broad spectrum of tire sizes and widths.
Pros:
- Features a dual-range pressure gauge
- Gauge markings are easy to decipher
Cons:
- The gauge, while consistent and precise, lacks accuracy
2. Lezyne Alloy CNC Floor Drive Bike Pump
No products found.
The Lezyne Alloy CNC Floor Drive pump is a meticulously crafted product. It features an extended, nylon-reinforced hose that wraps over the handle and secures to the base, serving a dual purpose: it prevents the plunger from unnecessarily extending and keeps the hose stable.
An oversized gauge is integrated into the base, making it easy to read and replace if it ever becomes inaccurate or ceases to function. The ABS 1 Pro Flip-Thread Chuck, compatible with both Presta and Schrader valves, ensures a secure connection to valve stems and includes a bleed button for optimal pressure adjustment.
It also features a valve-core wrench, a convenient addition for tubeless systems. The entire pump, CNC-machined from aluminium, is not only aesthetically pleasing but also durable. This pump has proven its longevity with more than two years of usage, and its gauge has demonstrated flawless performance in my tests.
Pros:
- Large, easily readable gauge
- High-quality metal construction with easily replaceable components
Cons:
- Not ideal for inflating high-volume tires
3. Topeak Mountain DA Mini Bike Pump
No products found.
Emerging as the winner in my testing was the Topeak Mountain DA Mini pump. While it stands out due to its larger size compared to other mini pumps, its performance is unquestionably effective.
It is best designed for high-volume tires, but it also manages to restore road tires to a rideable pressure efficiently. Its dual-stroke nature allows for incredibly swift tire inflation. Additionally, the built-in gauge eliminates any guesswork regarding the air pressure achieved.
This pump is an essential tool for both fixing flats and those unfortunate moments when you forget your floor pump at home.
Pros:
- The dual-stroke pump allows for the rapid inflation of high-volume tires
Cons:
- Larger than the typical mini-pump
4. Silca Tattico Mini-Pump
No products found.
Silca, renowned for its beautiful, intricately detailed, and impressively extravagant floor pumps, has ventured into the mini road pump market, producing one of the finest I’ve tested. The pump features a locking, lossless air chuck, compatible with both Presta and Schrader valves, which is attached to a flexible hose stored inside the pump when idle.
It effectively inflates a road tire to 100 psi, albeit not very quickly. However, the built-in heat sink makes the inflation process more comfortable by preventing the pump barrel from overheating as it reaches higher pressures.
Pros:
- Exceptionally well-constructed and user-friendly
Cons:
- Nearly twice as expensive as other mini pumps
5. Portland Design Works Ninja Mini Bike Pump with CO2 Inflator
No products found.
This compact yet powerful pump from Portland Design Works is a dual-function marvel! Offering the advantages of both a hand pump and a CO2 inflator, it can inflate your tires up to 100 psi, suitable for both mountain bike and road use.
Despite its small stature, it packs a punch, weighing in at a mere 3 ounces. Furthermore, it is compatible with both Schrader and Presta valves.
Pros:
- Integrates both pump and CO₂ inflator functionalities
Cons:
- Compact size may not be suitable for all
- Lacks a gauge
6. Bontrager TLR Flash Charger Floor Pump
The TLR Flash Charger presents a suitable alternative to an air compressor for fitting tubeless tires. It features a large vertical tank that can be pressurized up to 160 psi, the maximum limit indicated by the digital gauge.
To fit tubeless tires, simply attach the nozzle to the valve and flip the release lever from ‘Charge’ to ‘Inflate’ once the tank is pressurized. The pressure release can be modulated for a controlled inflation process. I found it beneficial to introduce air in small bursts when fitting a mountain bike tire, allowing the tire time to adjust.
The TLR Flash Charger also functions efficiently as a conventional high-pressure pump. According to my testing, the digital gauge is accurate up to 100 psi, the highest pressure our testing instrument can measure, with readings in one-tenth increments.
Though the pump’s size may make it cumbersome to pack in a car, it is an excellent addition to any home workshop.
Pros:
- Ideal for fitting tubeless tires
- Features a digital gauge
Cons:
- Its large size makes it difficult to transport or carry around easily
7. Topeak JoeBlow Booster Floor Pump w/ SmartHead
No products found.
The process of managing tubeless tires has become significantly simpler with Topeak’s two-stage floor pump. It features ‘Charge’ and ‘Inflate’ modes, making the seating of the bead on the rim a breeze.
The pump’s capacity to ‘hold’ up to 120 psi or 1 liter of air gives it the power to inflate your tires effectively. Additional features like a long hose, broad handles, and an easily readable instrument cluster make tire management a more enjoyable experience.
Pros:
- Specifically designed for tubeless tires
- Two-stage functionality
Cons:
- High cost
Wrapping Up — How to Use a Bike Pump
Tires have a tendency to lose air over time, especially with repeated use. Fortunately, you can purchase a bicycle pump to easily inflate your tires on your own.
While using a bicycle pump may seem straightforward and simple, it’s crucial to be cautious, as incorrect usage can cause significant damage to your bike tires.
Therefore, I have created this guide to provide you with essential knowledge on successfully using a bicycle pump. I have kept the steps clear and easy to follow, ensuring that you can benefit from this guide without the need for professional assistance when inflating your tires.
If you found this guide helpful in understanding how to use a bike pump, please feel free to share it with others. If you have any questions or suggestions, I encourage you to leave a comment below for further discussion.
How to Use a Bike Pump — Frequently Asked Questions
How often should I pump up my tires?
Prior to each ride, it is recommended to inspect your tires. Typically, this involves manually squeezing them to assess the pressure. While this method is not extremely precise, you will quickly develop a sense of the tire pressure and determine whether it requires inflation or not.
If you become more meticulous about it, you might consider acquiring a pressure gauge, which provides highly accurate readings of tire pressures.
This is particularly useful for mountain bikes, where even a slight variation in PSI can significantly impact handling and traction. However, it is equally applicable to road bikes, as it allows you to find the precise pressure that suits your preferences.
Why is my tire flat?
There are two probable explanations for your flat tire. Either you have a puncture, or your tire has gradually lost air over time. For a quick fix, glueless patches are an excellent option, while a more traditional repair kit provides versatility when you have a bit more time.
All tire systems experience gradual air leakage because tubes are not completely airtight. For instance, standard butyl tubes generally hold air better than lightweight latex tubes, which tend to leak air more rapidly. Even tubeless setups will experience slow air loss.
If your tubes are old, they are more likely to leak air compared to new ones. Therefore, it may be worth examining them if they haven’t been replaced recently. Additionally, although less common, there is a possibility, particularly with older tubes, that the valve is no longer sealing properly.
To determine the cause, the best approach is to attempt to inflate the tire. If it retains the air, then there is likely no further action required. However, loss of air pressure is a potential sign of puncture.
If the tire gradually loses air overnight, it indicates either a slow puncture or the need to replace an old tube.
How do I know my bike valve type?
To determine whether your tire valve is Presta or Schrader, refer to your bike’s manual. Alternatively, if you’re uncertain, you can contact the manufacturer for clarification.
Related: