You have mountains to climb. Gravel to kick up. Sites to visit. Hence, there’s no time for fiddling with bike tires.
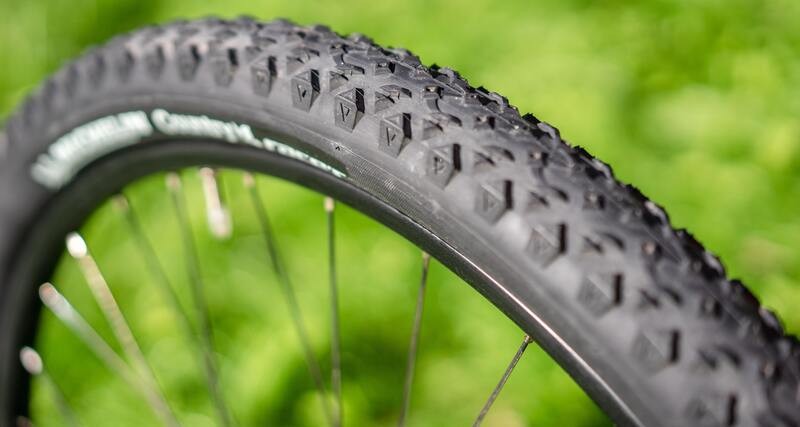
Tubeless tires are becoming popular nowadays for all types of bikes – mountain, gravel, road, hybrid, and more. No matter if you’ve been considering tubeless or are a dedicated tubeless fan, chances are you’ve wondered how they work.
The genius of tubeless tires lies in their two-fold functionality. They seal small punctures instantly, so you won’t have to pull over and waste time changing your tires. It is only possible because tubeless tires are injected with sealant.
Let me tell you one more thing…..
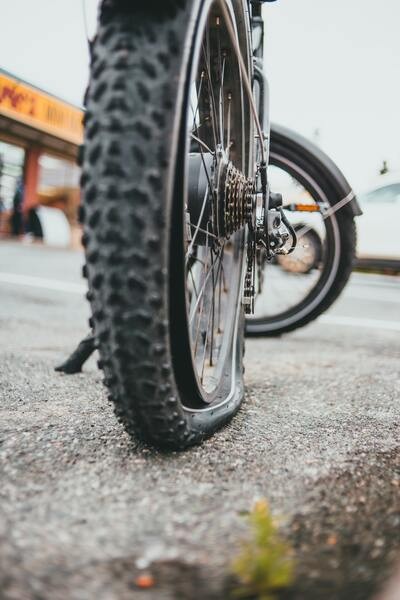
Despite how practical and innovative tubeless tires are, you’ll always need to repair your tubeless tire if a hole is too large to seal on its own. This challenge of repairing tubeless tires is well-known to longtime tubeless fans. The word messy doesn’t even begin to describe how cluttered it is.
However, there is good news!
Tubeless tire sealant injectors and tubeless tire repair kits make repairing and filling these tires super easy and mess-free. The kit contains various tools, so let’s explore their role in more detail.
Our Top 3 Picks for Tubeless Tire Repair Kit
The world of tubeless tire repair kits can feel like a maze of tools and plugs, leaving you staring in confusion. But fear not! We’ve slashed through the clutter and assembled the ultimate top 3 tubeless tire repair kits, perfectly matched to your riding style. Whether you’re a weekend warrior, a mountain bike shredder, or a long-distance touring enthusiast, we’ve got the kit that’s the perfect pocket-sized hero for your cycling escapades. Our rigorously tested picks prioritize ease, effectiveness, and durability, guaranteeing you’ll find the ideal sidekick to conquer flats and keep your adventures rolling. Dive in and discover the perfect tubeless tire repair kit for your riding journey!
No products found.
10 Must-have Inclusions for Flat Tire Repair Kit
When you go on a ride, you should carry the below-listed tools to repair the flat tubeless tire. A description of each tool is given, along with its role, to help you understand its significance. Let’s take a closer look at each one of them one by one.
1. Inner Tubes for tubeless tire puncture repair kit
Tubeless tire punctures are commonly fixed by simply replacing the inner tube. The repair takes only a few minutes and gets you home quickly.
Firstly, you will have to remove the tubeless valve; then, you will need to replace the inner tube, just like with a clincher wheel.
Please ensure that the inside of your tire is free of sharp objects, such as glass or sharp stones, since the sealant may have sealed several other punctures with these objects still inside.
When you go out for rides, be sure that you carry a spare tube with you. If you use rims with deep sections, ensure that the valve on the spare tube is long enough to fit those rims.
2. Rim Tape for a flat tire repair kit
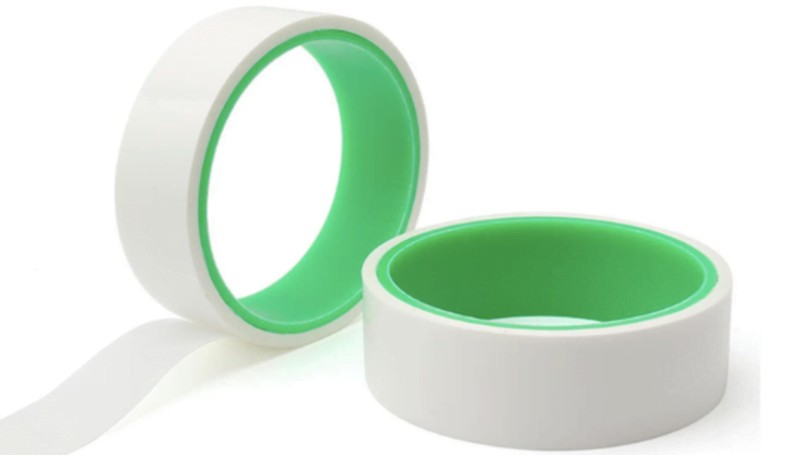
Rim tape is responsible for covering the spoke holes of your rim and further helps prevent the inner tube from expanding into the holes and puncturing the exposed spoke ends.
Rim tape is available in a variety of materials, including fabric or rubber. It is available in either a circular strip that can be cut to fit each wheel or an uncut length.
3. Tubeless Tire Patch Kit
Patch kits for bike tubes work well for sealing holes up to a certain size.
Self-adhesive patches do a decent job, but they only last for a short period. On the other hand, the glue-on patch provides a more permanent fix and is usually able to last for the entire life of the tube.
Usually, self-adhesive patches contain a sticky substance already applied. The only thing you have to do is find the hole in your tube, clean the area, and then apply the patch.
Conversely, the glue-on patch needs to be coated with a rubber cement-like compound before you use it to cover a hole. A period of time must pass after the patch is applied so it can bond to the rubber tube completely.
4. Super Glue for a flat tire repair
It can be used, but it is not recommended. Despite its effectiveness in repairing punctures, superglue is not intended for tire punctures. Moreover, superglue becomes very brittle and stiff after drying.
In other words, any patch based on superglue will fail eventually. In contrast, some glues use rubber cement instead of glue to seal punctures temporarily. You can prefer them instead.
5. Spare Valve for a tubeless bicycle tire repair kit
There is a tendency for valves to get damaged easily. Thus, when you plan on taking a long ride, always make sure to carry a spare valve to avoid bad situations.
This is because the valve is the main source that maintains the pressure of air within the rim of a wheel. And without a valve, you can’t survive your ride.
6. Tire Plugs for a tire puncture repair
Bike tire plugs are two-inch rubber strips inserted into tire punctures.
Placing the plug into the hole gives the sealant just enough room to work while retaining a flexible nature that allows it to roll with the tire while the sealant is applied.
Sadly, tire plugs can’t seal large holes in tubes, so in such cases, you might want to consider patch application.
7. Curve Needle & Thread
Before inserting an inner tube, you can keep the tire casing together by using thread and a needle. A strip of strong tape can be added between the sewn rubber and the inner tube if you decide to use this method.
Hence, packing a needle and thread is recommended for backpacking and touring trips that include extended hiking or biking.
8. Valve Core Tool
With the help of a handy valve core removal and installation tool, you can easily remove and insert valve cores without committing any errors.
The valve core tool is designed to protect your tire pressure monitoring system against damage caused by over-tightening or to eliminate leaky valves and false readings caused by under-tightening.
Moreover, due to the unique Twist-Tilt-Click precision torque feature, the valve core is automatically adjusted according to the manufacturer’s specifications. This tool is a must-have in your tubeless tire repair kit.
9. Pump for a flat tire repair
Whether on the road or off the road, you’ll need some way to inflate your tire after patching or replacing your tube. Make sure you always carry a small hand pump or a CO2 inflator that can be mounted to the frame or backpack of your bicycle.
10. Sealant for Tubeless Tires
Tubeless tire sealants are liquids that can be injected into your tires and automatically work to plug punctures and seal holes in your tires as they occur, causing them to disappear.
Although each brand of sealant functions similarly, the key difference is the added material. It may be latex-based sealants in some cases or carbon fiber in others. Regardless of the material, the goal is to suspend the particles so the sealant can adhere to them.
Tire sealant will effectively clog the puncture, preventing liquid from easily escaping. As soon as the area around the tire seals, the liquid will spread around in the space between the tire and the rim, completing the seal between the two.
Tubeless Tire Sealant — Everything you need to know
The primary purpose of tubeless tire sealants is to seal the air system and fill minor gaps where the tire bead connects with the rim.
Secondly, tubeless sealants repair holes caused by sharp objects like rocks or thorns.
The sealant spreads and coats the puncture whenever a puncture occurs, preventing air from escaping. Sealant particles allow latex to harden and seal before you notice a puncture because the particles provide surface area.
How to use the sealant for a tubeless tire
The application of tubeless sealants can be messy, but there are several methods to avoid a potential mess and headache.
The best method is to inject the sealant directly into the tire using the valve system and a valve core remover. Since normal sealant has smaller particles, you should measure the correct amount of sealant and remove the injector.
After that, you should squirt the sealant through the valve or spray it into a premeasured container with an injector tip.
If you do not have the proper tools to do this, or if the sealant you use has larger particles floating around in it, you can always separate the tire from the rim at a given section before pouring the sealant in.
It would be best in such circumstances to pour the sealant into the open tire while slowly turning the wheel, allowing the sealant to coat the inside of the tire until it is completely covered with a sealant.
The tube’s race sealant coagulates quicker than routine sealant, so it can fill bigger holes speedily than standard sealant.
How much sealant should one use
When setting up your tires for the first time or topping them off, you need different amounts of sealant.
Using four or five ounces of grease for new gravel and mountain bike tires is recommended. About two ounces is enough for road bike tires.
Even though these are rough measurements, adding a little extra is always preferable to cutting back.
Generally, new tires absorb sealant almost instantly, so it is recommended to use double the sealant you would use to top it off.
How to choose No Puncture Hassle Tubeless Tire Sealant
The best tire sealant for you will depend on your riding discipline, intended pressure, and whether you prefer absolute puncture protection or sealant requiring less frequent reapplication. Also, those with latex allergies should avoid the popular options.
Our tests on Orange Seal Regular and Stan’s No Tubes Original sealants reveal that both are reliable choices, the former being more effective at sealing larger punctures, while the latter is more durable.
Puncture-sealing effectiveness and durability are often compromised in an attempt to optimize which seals work the best.
As an example, Stan’s new Race Day sealant is stronger than the Original and is more likely to help seal bigger punctures, but it is also more likely to cause valve stem from clogging, and it needs to be replenished more often because it dries out more quickly.
Likewise, the Orange Seal Endurance sealant formula lasts far longer than the Original blend, but it does not have the same level of effectiveness in sealing large punctures.
We’ve found that Race Day Sealant or Orange Seal Standard’s larger sealing particles can better resist higher tire pressure than conventional sealant formulas.
Rest, as discussed above, depends on your needs and bike type. Also only give preference to sealants tested over one that is just marketed.
How to maintain and top-up tubeless tire sealant
Tubeless-ready tires don’t need to be maintained as often as you might think. Ensure that you monitor the tire pressure and leaks just as you would with a regular bicycle tire.
To be more precise, you will need to oversee the amount of sealant in your tires and know when to change it over time.
How long does tubeless tire sealant last
Depending on a number of factors, including the temperature and humidity of your area, how often you ride, where you store your bike (cooler is better), the thickness of the tire casing, how many punctures the sealant has already sealed that you were unaware existed, etc., the sealant should last approximately 2-6 months.
Most riders’ recommended preventative maintenance schedule is to check/refresh their sealant every three months (quarterly).
Can we mix different brands of tubeless tire sealant
In most cases, it’s best to avoid doing so. You’ll find that every tire sealant brand insists that their products are only effective if they aren’t mixed with other sealants.
Manufacturers of sealants even claim that mixing products of different brands could have adverse chemical effects.
However, most sealants on the market share similar ingredients, so while perhaps not ideal, topping up a tire with a different sealant than before shouldn’t pose any major problems.
Tips for Tubeless Tire Setup
There is a growing trend toward tubeless bicycle tires. But it can be tricky, time-consuming, and sometimes impossible to install a tubeless setup (especially at home instead of in a professional bike shop).
Here are some tips for taming tubeless tires, making installation quicker and easier. A good technique and the right tools make all the difference. So, here we go:
Tire warmup
It’s hard to seat and inflate tubeless tires that have been folded and stored in a cold basement. To have more success with tubeless tires, warm them up first with a hairdryer or outside in the sun.
Moving ahead, open up a folded tire into a hula-hoop shape and let it retake the form of a tire before mounting it up.
Use Bike-specific air compressors and inflators
Pro mechanics and bike shops don’t use floor pumps – they use air compressors and tools intended specifically for inflating bicycle tires.
Having an air compressor makes working with tubeless tires easy.
Take the valve core out
A valve’s core can impede the flow of air, regardless of whether you’re using an air compressor or a floor pump. To seat tubeless tire beads, we need a big blast of high-pressure air.
So, remove the valve core, then try seating the bead again if necessary. Getting the valve core out of the way can sometimes allow a little more air to pass through.
After removing the inflator head or pump, all the air immediately escapes through the valve, so the valve needs to be re-seated with the beads to remain airtight.
Make use of a suitable sealant
Don’t mess with the tire beads again once you’ve seated them. A good tire sealant will last longer before it needs to be applied again since it dries out through evaporation over time.
Orange Seal Regular and Stan’s No Tubes Original sealants are highly recommended. Check the sealant manufacturer’s instructions for guidelines on how much to use.
Add sealant through the valve
If possible, avoid unmounting your tubeless tire once it is mounted. The same applies to adding sealant.
Whenever possible, top off the sealant through the valve instead of breaking the tire bead again to save time.
This can be made simple with inexpensive injectors that inject sealant into the valve core.
Lubricate tire bead
The rubber on the tire bead can sometimes stick to the rim strip, preventing the tire from popping into place. If this happens, try mixing some dish soap with a little warm water to lubricate the tire bead.
We only need the suds, not the water. Using a sponge, apply bubbles to ease the seating process.
Try an inner tube
Sometimes, no matter how well you use your tools or techniques, a tire/rim combination won’t work. During this situation, remove the tubeless valve and install an inner tube, then inflate the tire normally.
Once you have ridden it for a few days, unmount one side of the tire, reinstall the tubeless valve, attach your sealant, then remount the other. Tubeless tire installation is more straightforward when one tire bead is already installed.
Flat Tire Repair Kit — Bottom Line
Although tubeless tires are less likely to puncture than tube tires, air loss is still possible. As a result, you should always be equipped with the proper knowledge and a tubeless tire repair kit to repair punctures both on and off the trail.
Hopefully, the above-mentioned tools will be enough to fix the flat tire problems in your time of need.
Else, if you have any suggestions or doubts, feel free to drop us a comment below. I will be more than happy to assist you with your query. Please like, share, and follow our Facebook Page for more guides like this.
Tubeless Tire Repair Kit — FAQs
How to stop a tubeless tire from leaking?
The first step to preventing tubeless tires from leaking is to know how to maintain them effectively. Depending on the situation, here are some things you can do:
1. Leakage Through Spokes/Valves – Cover all spoke holes and valves on the tires with a rim strip.
2. Sealant Leaking Through Bead – When this occurs, carefully inspect the seating process to ensure that the wheel rim and bead are not obstructed. Alternatively, you can simply lower the air pressure to stop it from leaking.
What if the tubeless tire sealant doesn’t fix a flat?
If you notice larger holes or gash in the tire that is not easily fixed with sealant alone, then it will be necessary to patch the tire and perhaps even install a tube until you arrive home. Add more sealant to your rim tape if there are no signs of damage to the rim tape or tire.
How to clean tubeless bike tire sealant?
Badass Bubbles and warm water are the best way to remove the old sealant. Allow it to soak for one to three minutes, then wipe it with a brush, sponge, or cloth. In just a few steps, your wheels will be ready to receive a new application.
Are tubeless tire plug kits permanent?
The tubeless plug kit should not necessarily be considered a permanent solution, even if it remains in place for a long time after insertion. Because riders who generally ride may pull the plug when they put force in their tires.
Is sealant necessary on tubeless tires?
True tubeless tires don’t have a seal on their surface, but tubeless tires do require a sealant that will become breathable once the sealant has dried on the tire. In this way, the tire can have a lower torsional weight and stronger beads, which will prevent blowouts.
Is it better to patch or plug a flat tire?
Whenever there is a big hole closer to the side wall but not on the side, a patch is preferable to a plug. Note that the tire sidewalls usually need a repair and should be replaced as soon as possible. It is never a good idea to fix tires near their sidewalls. Always change them when required.
Related: