It is undeniable that disc brakes are the most powerful brakes available for bikes. Still, in order to keep them as quiet, powerful, and consistent as possible, they must be maintained appropriately.
To clarify the best way to maintain your disc brakes, I have even talked to industry experts about how to repair, align, and clean them.
It doesn’t matter whether the disc brakes are hydraulic or mechanical. All kinds of scrapping noises can be heard with disc brakes. Such noises are usually characterized by rubbing and squealing. These are the signs that you need to check your brakes urgently.
It is primarily the surface of the disc rotor that is contaminated and leads to brake noises.
However, other factors also contribute to bike disc brake rubbing. That is what we will try to explain in this article. Moreover, I will also let you know how to resolve disc brake rubbing issues. So that you can enjoy a noiseless ride.
Disc Brakes Rubbing — The Silent Enemy of Your Ride
Squeals or screeches are usually associated with rubbing disc brakes. Now, this noise can be the outcome of many problems with your bike.
In most cases, what will catch your attention, or maybe of your riding buddies, is a noisy disk brake, occasionally when brakes are applied, sometimes when they are not. The thing happening here is that one or more brake pads are slightly touching the brake rotor.
Conversely, if the brakes are noisy when you pull the brake lever, then it is a sign of some kind of contamination that has entered the system.
In addition to these signs, some other problems with disc brakes are equally responsible for the scrapping or grinding noise production. We will discuss them all in detail further.
However, please note that it is challenging to fix grinding brake noise problems. Especially if you do not have much experience working on your bicycle.
You may need more than a video to get this noise fixed. In these situations, hands-on assistance can be beneficial.
So, kindly try implementing the solutions that I am going to share with you in the next section of this article. Because that’s the most efficient way of solving the rubbing disc brakes problem.
Bike Disc Brakes Rubbing Reasons with Solutions [Tested and Tried]
Diagnosing the root cause of bike disc brake rubbing is the simplest, cheapest, and fastest approach to troubleshooting related problems. Secondly, knowing how to solve it.
That’s exactly what I’ve tried to accomplish in this section. Here I have shared the possible causes of bike disc brakes rubbing with their practical solution. So, without delay, let’s jump into understanding them.
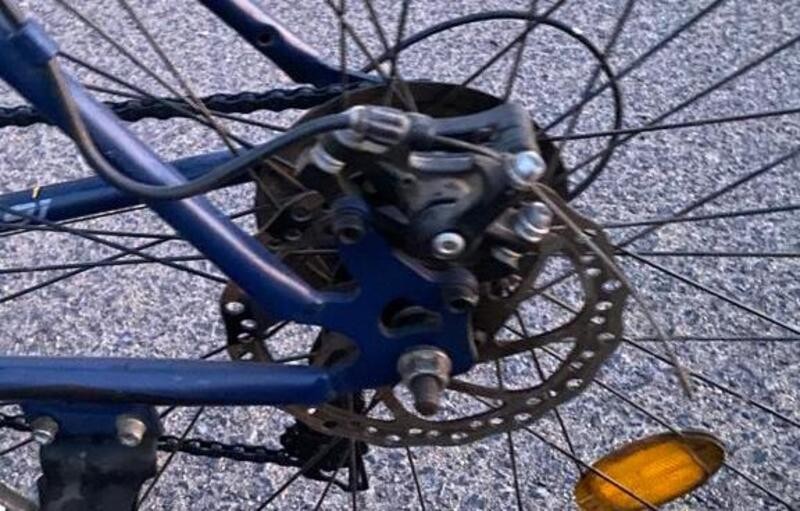
1. Brake Caliper Misalignment [A risky reality]
Poor alignment of the brake caliper with the disc rotor is the most common cause of rubbing disc brakes. The brake caliper should be centered on the rotor.
Without it, there will be an annoying scrapping noise caused by the brake pads or caliper body.
Fix your Bike Caliper Misalignment [Quickly]
To realign the brake caliper and avoid it from rubbing, loosen the two bolts that attach the brake to the caliper and then pull on the brake lever firmly. This will center the caliper because the bolts are loose. Ensure that the caliper mounting bolts are tightened while holding the lever in place.
Check if the brake still rubs by spinning the wheel. If the caliper alignment is not quite accurate, you may wish to repeat the loosen and retighten process once again, or you can try caliper alignment by loosening only one bolt at a time.
Retighten the bolt after spinning the wheel and gently adjust the caliper (push the caliper in the direction that is effective at eliminating rubbing) using your hands.
Your bike may have something more serious issue if rubbing persists despite completing this procedure. It is crucial to make sure the mounting bolts for the rotor are properly tightened and the wheel’s hub does not have any play in it. The looseness of one or both of these may contribute to rubbing.
2. Bent Disc Rotor
When a brake begins scraping noise when braking, then there is a high possibility that the rotor needs some straightening. If the rotor on your disc brakes is warped or twisted, it can cause loud noises while braking, plus squeaking during the ride.
There are several reasons why a disc rotor can warp, including normal wear-and-tear or getting too hot. In most cases, a bent rotor is caused by a direct impact on the bike while parking or storing it.
Note: A badly bent rotor should be replaced as soon as possible.
Identifying whether the rotor is repairable or not can be a difficult process. You may need to replace your rotor if the performance of your rotor does not improve after a few minutes of working, which indicates that it has probably outlived its worth.
The rotor will not be able to be straightened again once because it has been worn down too much. Rotor edges can be sharp, so be careful when handling them.
Straighten your Disc Brake Rotors [Step by Step]
You can usually straighten the rotor by watching it move through the brake caliper, while you have still kept the wheel on the bike.
The best way to ensure the wheel spins freely on the bike is to set the bike upside down on the ground.
- Keep an eye out for wobble between the pads of the caliper.
- Check the gap’s opening and closing.
- Observe which section in the rotor requires truing.
- Plus, see in which direction it needs bending to correct the runout of that particular section.
- For more light, you can use a flashlight.
- The rotor should be rotated out of the caliper while this section is still attached.
Note: A rotor truing fork tool can bend the rotor in the desired direction.
You should always begin by applying a small amount of effort to the tool. Then if no improvement is seen, apply more effort.
Re-sight the rotor after spinning the wheel. Repeat as needed. If the rotor does not rub against the pads while spinning, it is straight enough.
3. Dirty Brake Rotors
Dirty brake rotors usually cause disc brakes that squeak and may cause scraping noise when braking.
How to clean Dirty Brake Rotors
If you want to clean dirty brake rotors thoroughly, remove the wheels and clean the rotors with water or a cleaning solution from a good bike shop.
Oily rotors need to be cleaned very carefully, but oily brake pads cannot be cleaned and must be replaced.
4. Wheel Position in Dropouts
The wheel can get tilted to one side if the frame has horizontal dropouts facing forward or backward. Improperly seated wheels can cause friction between the brake pads and the brake rotor, which can further cause a scraping noise when braking.
Fixing incorrect wheel position in dropouts
This problem can be resolved by opening the quick-release and pulling the wheel backward while ensuring that the rim brakes are laterally leveling.
The rear dropouts of many old-school road bikes (especially those with two small bolts) are prone to this problem. It is ideal for those bolts to be inserted equally in the dropouts.
After that, the user pulls back the wheel until the skewer or axle touches the bolt head. By doing this, the wheel is centered.
Alternatively, vertical dropouts do not cause this problem because the wheel has no room to move. Despite this, you should still check the wheel since it may not be fully seated vertically.
5. Contaminated Brake Pads
The problem is likely contamination if your brakes squeal loudly and consistently whenever you apply them. The porous nature of brake pads allows them to absorb grease and oils easily, causing them to squeal and not perform effectively.
A variety of substances can end up on your brake pads, such as bike polish, chain lube, degreaser, and brake fluid. Even the mere act of touching the rotor or pads with your hands can result in contamination!
How to Eliminate Brake Pad Contamination Instantly
When you suspect your brake rotors have been contaminated with grease or oil, wipe them off immediately with isopropyl alcohol and a clean rag.
You do not have to give up if you have already contaminated the pads! The pads can be removed from the caliper, and the outer layer can be sanded down using fine-grained sandpaper. It is, however, best to replace your brake pads if they have been soaked in chain lube.
6. Worn Out Brake Pads
A worn-down brake pad, as well as one that has deteriorated and becomes brittle from age or constant exposure to the sun, will not provide sufficient braking power and will lengthen the distance you need to stop.
How to Fix Worn-Out Brake Pads Easily
If you experience longer braking distances or need to apply more pressure to the brake levers that are mounted on your handlebars, it may be time to replace your brake pads.
The rubber surface of brake pads has parallel grooves that indent the wheel rims. Once the grooves on the rubber no longer exist, it’s time to go for new brake blocks.
Make sure you have your bike’s brake pads replaced by an expert at a certified bike shop or sports store. The person who does the job will ensure that it is done correctly.
7. Brake Pad Material Quality
While choosing disc brake pads for your bike, always ensure that your disc rotor is entirely compatible with your preferred brake pad material.
Because a good disc rotor and pad material combination give optimum riding experience. While a wrong pair causes bike disc brake rubbing problems.
Pad material is very important for your complete braking system. Remember, organic pads help in a quiet ride. On the other hand, metallic pads are slightly noisy.
8. Disc Brakes Not Bedded Correctly
The purpose of disc brake bed-in is to prepare new disc rotors or pads for some serious use by shifting material from the brake pad position to the rotor via a cautious heating/cooling cycle. This results in better control and power of the brakes.
If a set of disc brakes hasn’t been properly bed-in, you’ll quickly notice it, and you’ll also hear it. Poor or nonexistent bedding can cause loud squealing noises.
When pad material fails to be appropriately bed-in, it accumulates on the rotor, causing high-frequency vibrations. Particularly when things get moist, high-frequency vibration results in noise.
How to Bedding In Disc Brakes for Maximum Braking Performance
There are slight variations in the bed-in procedures used by each disc brake and pad manufacturer, but all follow a similar pattern. Brake pads and rotors should be heated and cooled in a repeatable and consistent manner to avoid damaging them.
Keeping the transfer layer consistent is the goal here. My experience has shown that the following steps work well:
- Take your bike to a place where there is sufficient space. Start pedaling at a moderate pace – about 15km/h.
- Put the brakes on evenly without skidding until the speed reaches walking speed.
- While moving, release the brakes.
- You should repeat this ten times. With each repetition, you’ll feel your brake power increase.
- Each time you repeat the exercise, be cautious not to skid.
- Follow the same steps, but increase the speed to 25 km/h.
- Then repeat the process five or six times.
9. Overfilled Brake Fluid
Over-filling occurs when the brake system is bled without resetting the position of the pistons on the brake calipers beforehand, which results in an overload of the brake system with brake fluid.
This can occur when worn brake pads are in the system while it is still being bled. A brake pad changes its shape as it wears, causing the pistons of the caliper to advance outwards. This way, the pads are kept close to the rotor, resulting in a consistent bite point on the brake lever.
Adding too much brake fluid to the system can lead to impossible brake pad replacements. Also, adding more fluid to the brake system prevents you from resetting the pistons.
Quick Fixes to Deal with Overfilled Brake Fluid
You can avoid this problem by removing your brake pads, pushing back the pistons, and inserting a bleed block between the pistons. In this way, the brake system will be left with the correct amount of brake fluid.
If you suspect your brake fluid is overfilled, you should remove it. It is always advisable to vent brake fluid from the lever, which is the highest point in the braking system. In this way, air will not enter the system.
If you wish to have your caliper pistons fully reset, all you need to do is loosen either the lever bleed port screw or the top cap of the reservoir.
In this way, the excess brake fluid will be evacuated, leaving the correct amount of brake fluid behind.
10. Incorrectly Torqued Rotor Or Caliper
The disc rotor and brake caliper must be rightly torqued. Otherwise, they produce a horrible metallic noise while riding.
Now, understanding how much torque both the rotor and caliper need is a big question. Because too tightened or too loosened torque leads to heavy vibrations while riding. So, always follow the torque reading mentioned on both of these components.
Eliminate Incorrectly Torqued Rotor or Caliper: Here’s the Solution!
Ideally, center lock rotors require 40Nm of torque. Conversely, a six-bolt disc rotor can be tightened nicely by following start shaped pattern.
Tighten the first bolt and then move to the opposite bolt tightening. Then head to the second bolt, which you can quickly check right next to the first bolt.
Followed by its opposite bolt, and so on. Following this trick gives you relief from clanging noise permanently and quickly.
11. Frame Spray Issue
A brake caliper functions efficiently only if it’s centered and aligned in its mounts. In case mounts have any manufacturing default, then your caliper can never be aligned correctly.
How to Achieve Lasting Protection with the Frame Spray Solution
There is no solution to this problem because, at the end of the day, it’s a manufacturing default.
However, if your caliper is misaligned because of huge paint in the surrounding mount points because of frame spraying. Then this issue is solvable.
Simply go to a good bike shop that has access to a facing tool. They will clear mounting points surrounding the area well to centralize your caliper nicely.
12. Mechanical Disc Brakes
In mechanical disc brakes, calipers are not drawn back with piston rubber seals. However, this is very common in hydraulic brakes. Plus, as per mechanical disc brake construction, only one piston remains in motion, and the other one is fixed.
Because of this design, mechanical brakes are more prone to going in the wrong position. This also generates a high possibility of rubbing in the brakes. Which ultimately produces a creaking noise.
But no worries because you can resolve this issue in the first place by just simply centering the brake caliper.
How to Align Your Mechanical Disc Brake for Optimal Performance
For this, put your bike on its bike stand. Then you can diagnose which part of the rotor is contacting the brake pads much more quickly. Now after finding the spot, mount brake calipers and align them correctly.
Moving ahead squeeze the lever to the center and align the caliper.
To determine if the rotor is rubbing against the brake pads, spin the wheel while the bike is still on a bike stand. This method is usually a good place to begin centering the caliper, although it often requires some fine-tuning after this step.
Then install the alignment tool and tighten up the brake caliper bolts evenly. Check if the rotor is rubbing after you remove the tool. In case yes, then try centering the caliper with your own hands.
Sometimes, the rotor is bent slightly, making it nearly impossible to center the caliper without straightening it. If it happens to you, then please refer to the second point of this article, “Bend disc rotor”. This point will give you enough knowledge to straighten your rotor.
Note: If you follow the above-shared steps nicely. Then it’s a promise that you’ll not face any noise issues with your mechanical disc brakes.
13. Shabby Brake Caliper Pistons
Shabby brake calipers are highly responsible for not retracting pistons once you have released your brake lever. This ultimately makes way for brake pads to get easily rubbed on discs.
However, you can clean the brake pistons to make them work normally.
Refresh Your Brake Caliper Pistons in Minutes
You need to pump the brake lever till one or both pistons are exposed, approximately 3 to 4 millimeters from the top. You mustn’t push them out completely.
Clean the pistons with a spray degreaser and one paper towel, then don’t forget to apply silicone grease with the brush on the outer edges.
If hardly one piston came out while you pumped the lever. Then firstly clean, lube, and press back your first piston. Moving ahead, remove another piston with the piston press tool, or you can use a screwdriver too.
Follow exact same process for cleaning it as for the first one. And press it back again into the caliper. With this, you have done cleaning.
14. Manufacturing Default
If you have tried and tested all the above methods. Even has shown the cycle to a mechanic, but that noise still exists. Then there is a high possibility that your bike has some manufacturing default or error.
We live in a world that is full of error and unbelievable possibilities. So, manufacturing default can exist. However, such cases are sporadic.
Bottom Line — Grinding Brake Noise
The best way to maintain your bike’s brakes is to keep them in good condition like you would maintain your car’s brakes.
It is usually easy to fix bike disc brake rubbing by following our tips and processes above. Therefore, please include these strategies while working on your bike.
If you need any other further details, please leave a comment below. I will be more than happy to assist you with your query. Please follow our Facebook Page for more guides like this.
Have fun riding…..
Scraping Noise when Braking — FAQs
Why is my bike disk brake rubbing?
Brake rotors that are not correctly centered between the brake pads cause scraping or grinding noises. Many times, this occurs when the brake calipers are not perfectly centered.
You can fix this by loosening the screws that secure the brake lever to the caliper. Retighten the screws firmly with the lever pulled tight.
Is it normal for new disc brakes to rub?
The disc brake systems don’t often cause any rubbing issues, especially when they are road bike disc brakes. Because they are very efficient and precisely fitted.
Is slight disc brake rub OK?
No, a slight disc brake rub is also not ok. Most of the time, a little brake rub does not pose an immediate threat to your health or the bike’s safety. But still, that’s not good because, slowly and steadily, it will affect your performance and bike maintenance too.
How do you fix rubbing disc brakes on a bike?
The disc brake lever is pulled down when the rotor rubs. The centrality is assured here. It is possible that the rotation of the rotor needs to be adjusted if the friction continues. Then you may want to make your own rotor forks by hand.
Related