As a passionate cyclist, you understand the importance of regular maintenance and fine-tuning your bicycle to ensure peak performance.
Changing your bike chainrings is a quintessential skill in this repertoire, one that’s bound to elevate your biking experience to new heights.
In this riveting article, we’re going to delve into the nuts and bolts of swapping out your bike chainrings. This seemingly daunting task is actually quite straightforward once you get the hang of it, and the rewards are certainly worth the effort.
Whether you’re looking to upgrade for better speed and efficiency, adapt to new terrain, or simply replace a worn-out part, changing your bicycle chainrings can transform your ride.
So, roll up your sleeves and get your hands dirty as I guide you step-by-step through the process of changing your bike chainrings.
Trust me, by the end of this tutorial; you’ll not only have a revamped bicycle but also a newfound sense of accomplishment and an expanded toolkit of bike maintenance skills.
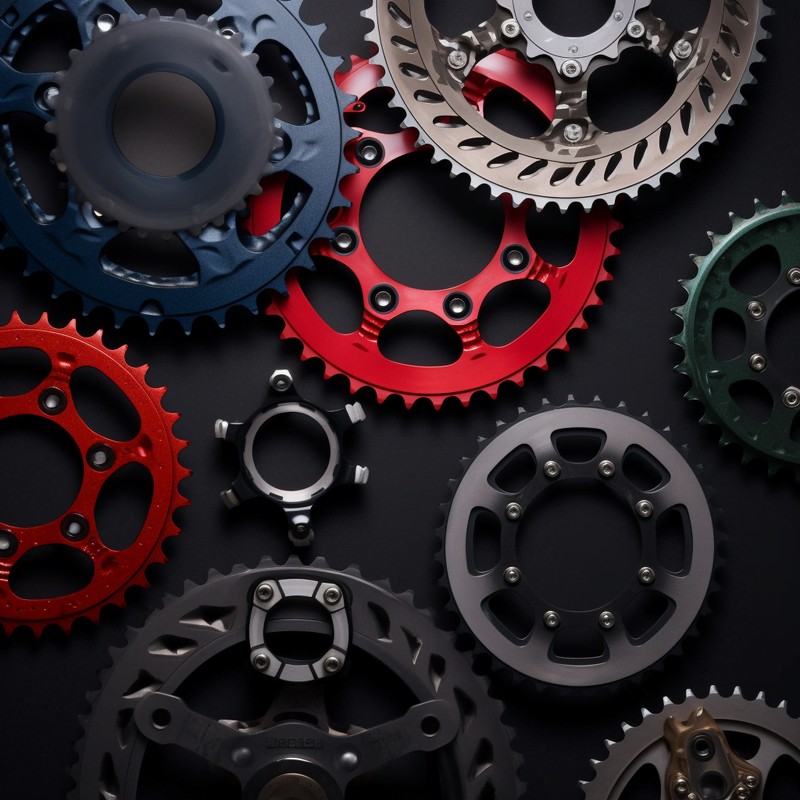
Definition of Bicycle Chainring
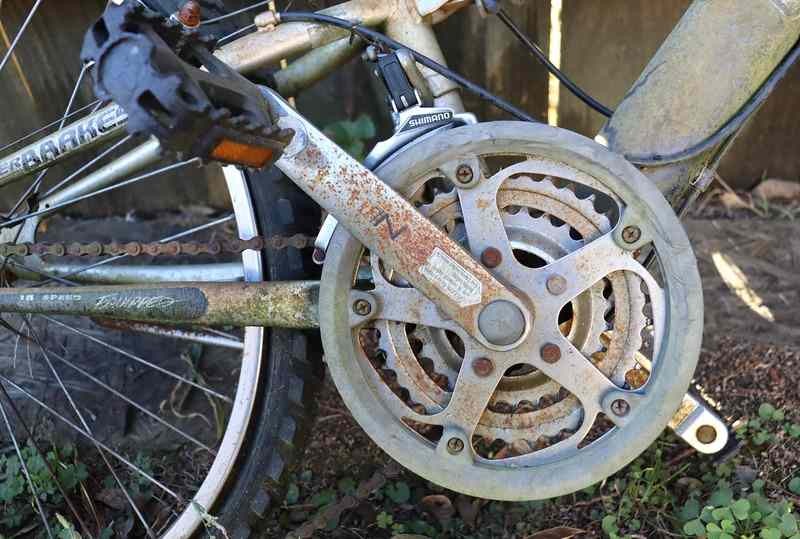
A bicycle chainring is a toothed component of a bike’s drivetrain that is mounted to the crankset and engages with the bicycle’s chain to transfer power from the rider’s pedaling to the rear wheel.
The chainring typically consists of a circular plate with a series of teeth around its perimeter, which mesh with the links of the bike’s chain to provide rotational force to the rear wheel.
The size and number of teeth on the chainring can affect the gear ratio of the bicycle, which determines the pedaling effort required to achieve a certain speed or climb a particular hill.
Must-Have Tools to Change Bicycle Chainrings
Now that we’ve set the stage for our thrilling mechanical endeavor, let’s turn our attention to the stars of the show: the tools. These are your loyal allies in the mission to change your bike chainrings. Let’s get to know them a little better.
Hex or Torx Keys
These are the faithful workhorses of any bike mechanic’s toolbox. Hex keys, also known as Allen keys, come in various sizes and are used to tighten or loosen hexagonal bolt heads.
Torx keys, on the other hand, are for star-shaped Torx screws. These keys are essential for removing the chainring bolts that secure your chainring to the crankset. The type you’ll need—hex or Torx—will depend on your bike’s specific hardware.
BB Removal Tool
Known as the bottom bracket (BB) removal tool, this is the specialist you call in when you need to remove the crankset from the bike. The bottom bracket is the part of the bike that the crankset (which houses the chainrings) rotates around.
In some cases, you may need to remove the crankset to replace the chainrings, and the BB removal tool makes this process a breeze.
Chainring Nut Wrench Tool
This unsung hero is crucial when dealing with chainring bolts. The chainring nut wrench tool is designed to hold the slotted nut in place while you use your hex or Torx key to loosen or tighten the bolt on the other side.
Without this tool, the nut would just spin freely, making it nearly impossible to tighten or loosen the chainring bolt. Using a chainring nut wrench tool provides the necessary counterforce and ensures a secure connection between the chainring and the crank arm.
Remember, having the right tools for the job isn’t just about making the task easier – it’s also about ensuring you don’t damage the delicate parts of your bike in the process.
By treating your bicycle with the care it deserves, you’ll enhance its longevity and ensure many more miles of smooth, enjoyable riding.
So, with your tools at the ready, it’s time to embark on the exciting journey of changing your bike chainrings!
Things to Keep in Mind Removing Bike Chainrings
To start, determine the right tools for the job: a chainring nut wrench and a hex or torx wrench that fits your chainring’s nut and bolt, respectively.
Once you’ve got your tools ready, work on loosening the nut on the front side of the chainring while simultaneously making sure the bolt on the reverse side is held steady.
When you’ve successfully detached the chainring, be sure to keep the nuts and bolts safe for future use with your new chainrings. Finally, gently slide the chainrings off the crankarm.
Installing Bike Chainrings
When you’re ready to put new chainrings onto your bike, the process is fundamentally a reversal of the steps taken to remove them, beginning with the biggest ring.
Firstly, gently slide the chainring onto your crankarm. Pay attention to the direction: the brand name of the chainring should face outward (away from the bicycle) while the ramped edges should be oriented toward the bike.
These ramps are important for facilitating a smooth transition of the chain when shifting between chainrings.
Bigger chainrings typically come with a protective pin or tab. This feature is designed to stop your chain from getting wedged between the chainring and the crankarm. Ensure that this pin is positioned in such a way that it juts out from the bike’s body and settles behind the crankarm.
Before installing the nuts and bolts, apply a layer of grease to them. This helps to protect against corrosion and reduces friction, making them easier to install and remove in the future.
Then, using the same tools you used for the removal, begin to attach the bolts and nuts. However, don’t fully tighten them just yet.
Once you’ve fitted all the bolts and nuts into their respective places, go around the ring and give each bolt a quarter turn to make sure they’re secure but not overly tight. After you’ve done this for all bolts, use a torque wrench to double-check each one.
Tighten them according to the manufacturer’s specified torque settings. This ensures that the chainrings are held securely but not overly tight, which could lead to damage.
Next, get your chain back onto one of the chainrings. To confirm that your installation process has been successful, turn the pedals with your hand to see if everything runs smoothly.
Keep in mind, if you’ve switched to a larger outer chainring, you might need to adjust the front derailleur’s height also.
What is the Recommended Frequency for Changing Bicycle Chainrings
The frequency of chainring replacement on your bike depends on a number of factors, including:
- How often you ride: More frequent riding will lead to quicker wear of your chainrings.
- Your riding style: More aggressive riding styles, such as mountain biking, can cause faster wear and tear.
- Maintenance habits: Regular cleaning and lubrication can extend the life of your chainrings.
- Chain condition: A worn chain can accelerate chainring wear.
On average, a chainring can last anywhere from 10,000 to 20,000 miles under normal conditions with proper maintenance. However, this is a rough estimate, and the actual lifespan can vary significantly.
It’s important to regularly inspect your chainrings for signs of wear. If you notice any hooked teeth or uneven wear, or if the chain slips over the teeth under load, it’s probably time to replace your chainrings.
Also, if you’re replacing a significantly worn chain, it’s often a good idea to replace the chainrings at the same time to ensure optimal performance and longevity.
Remember, preventative maintenance is key for extending the life of your bike components, so make sure to keep your chain clean and well-lubricated and to replace it when it shows signs of wear.
Pro Tips for Bike Chainring Maintenance
Maintaining the chainrings on your bike is essential to ensure a smooth and efficient ride. Here are some tips for bike chainring maintenance:
Clean Regularly
Dirt and grime can build up on your chainrings over time. Use a degreaser and a brush to clean the chainrings regularly. This not only helps in prolonging the lifespan of your chainrings but also ensures optimal performance. After cleaning, make sure to dry the chainrings to avoid rusting.
Lubricate
After cleaning and drying your chainrings, apply a suitable chain lubricant. This will help to reduce friction and wear, ultimately extending the life of the chainring.
Inspect for Wear
Over time and with use; chainrings can wear down. A worn chainring can cause your chain to slip or not engage properly, affecting your ride. Look for uneven or sharp teeth, as these are signs of wear. If your chainring is worn, it’s usually best to replace it.
Check for Tightness
Regularly check the chainring bolts for tightness. Loose chainring bolts can lead to a wobbly chainring, which can cause the chain to fall off or damage the chainring or crank arm. Use a torque wrench to tighten the bolts to the manufacturer’s specifications.
Replace When Necessary
Even with regular maintenance, chainrings will eventually wear out and need to be replaced. Don’t wait until the chainring is so worn that it causes problems. Regular inspection will help you identify when it’s time for a new chainring.
Alignment
Make sure your chainrings are properly aligned with your chain and other components. Misalignment can cause the chain to jump or not shift properly.
To Wrap Up — Bike Chainrings
Changing your bike chainrings might seem like a tough task, but with the right tools and a step-by-step approach, it’s something that can be done by anyone willing to invest a little time and effort.
From removing the old chainrings to installing the new ones and making necessary adjustments, every step is crucial in ensuring a smooth and safe ride.
Remember, the key to successful chainring replacement lies in the accurate identification of the tools needed, careful handling of the components, and meticulous attention to the details of the installation process.
Don’t forget to maintain your new chainrings regularly, including regular inspections, cleaning, and lubrication, to extend their lifespan and ensure optimal performance.
Whether you’re a seasoned cyclist looking to upgrade your gear, or a bike maintenance newbie trying to expand your skill set, changing your bike chainrings is an invaluable skill that will enhance your biking experience.
Please share your thoughts and feedback on the article in the comments section, and let me know how you change the bike chainrings. Please like, share, and follow our Facebook Page for more guides like this. Have fun riding!
Bike Chainrings — Frequently Asked Questions
Can I mix and match bicycle chainrings from different manufacturers?
In most cases, it is possible to mix and match chainrings from different manufacturers, but it is important to ensure that the chainrings are compatible with your bike’s drivetrain.
Chainrings are designed to work with specific types of chain and drivetrain components, and different manufacturers may use slightly different specifications. For example, the spacing between chainring teeth and the thickness of the chainrings can vary between brands.
If you want to mix and match chainrings, it’s important to ensure that the chainrings you choose are compatible with your bike’s drivetrain. You should check the specifications of your bike’s drivetrain and the specifications of the chainrings you are considering to ensure they are compatible.
It’s also worth noting that some bike manufacturers may not recommend mixing and matching components from different brands, as it can affect the overall performance and durability of the bike.
Therefore, it’s always a good idea to consult with a bike mechanic or expert before making any changes to your bike’s drivetrain.
Do I need to adjust my derailleur after changing my chainrings?
When you change your chainrings, it’s possible that the front derailleur may need to be adjusted to ensure that it can shift smoothly between the different chainrings.
This may involve adjusting the derailleur’s cable tension, limit screws, or height to ensure that it is aligned properly with the new chainrings.
It’s important to note that adjusting the derailleur can be a complex process that requires a good understanding of bike mechanics. If you are not familiar with how to adjust a derailleur, it’s recommended that you take your bike to a professional mechanic or bike shop to ensure that it is set up properly.
In addition to adjusting the derailleur, you may also need to adjust the length of your chain to accommodate the new chainring sizes. This will ensure that the chain is not too loose or too tight when shifting between the different chainrings.
Can I change my chainrings without removing my crankset?
In most cases, it is possible to change your chainrings without removing your crankset, but it will depend on the design of your crankset and the type of chainrings you are replacing.
Some chainring designs are bolted directly onto the crankarms, while others may be attached to a spider that is bolted onto the crankset. If your chainrings are bolted directly onto the crankarms, it may be possible to remove them without removing the entire crankset.
However, if your chainrings are attached to a spider that is bolted onto the crankset, you will need to remove the entire crankset to replace the chainrings.
Can I change the number of teeth on my chainrings?
Yes, it is possible to change the number of teeth on your chainrings, but it may require changing other components of your bike’s drivetrain to ensure that everything works properly.
Changing the number of teeth on your chainrings can affect the gear ratios of your bike and may require adjustments to your front and rear derailleurs, chain length, and shifters. For example, if you increase the number of teeth on your chainrings, you may need to adjust your front derailleur to accommodate the larger chainring size.
Similarly, if you decrease the number of teeth, you may need to adjust your rear derailleur to compensate for the change in gear ratio.
In addition to adjusting the derailleurs, you may also need to change your chain to accommodate the new chainring sizes. This will ensure that the chain is not too loose or too tight when shifting between the different chainrings.
Related: