I believe that a dropper post is a valuable addition to every mountain bike, and it can even benefit some gravel and road bikes.
Of course, there may be different opinions on this matter. But dropper posts offer the riders the ability to find a comfortable position for efficient uphill pedaling and, with a simple button press, lower the seat for a more comfortable and stable descent.
Most medium- to high-end mountain bike builds come equipped with a dropper post, while lower-priced bikes often have a fixed, rigid seat post. Trust me, adding a dropper post is one of the most worthwhile upgrades you can make to any bike without one.
Below, you’ll find my recommendations for top-notch dropper posts, a list of essential features to consider when selecting a dropper post, and answers to frequently asked questions regarding these posts.
What is a Dropper Seatpost
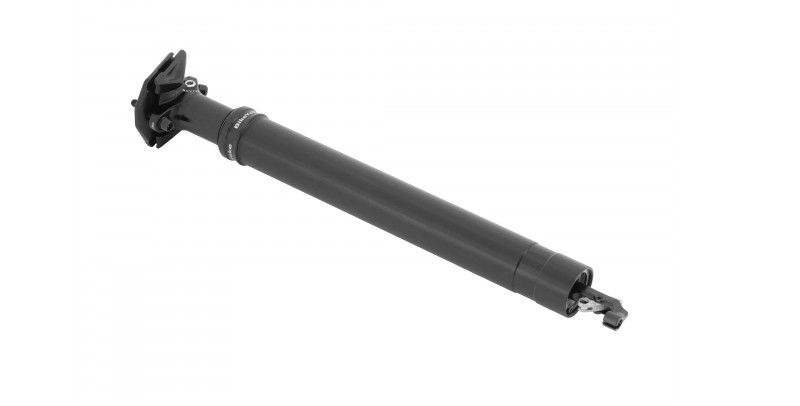
A dropper seatpost, also known as a dropper post or adjustable Seatpost, is a component found on bicycles that allows the rider to change the height of the saddle while riding.
It provides the convenience of quickly raising or lowering the Seatpost with the press of a lever, typically mounted on the handlebars.
What is a “Stealth Dropper Post”
The majority of dropper posts currently feature a “stealth” design, which means that the cable or hose connecting the post to the remote lever is routed internally through the bike’s frame and attaches at the bottom of the Seatpost.
In the early days of dropper posts, bikes were not originally designed with internal routing in mind. As a result, the remote cable would connect at the top of the Seatpost and had to run externally along the frame.
This setup had several drawbacks, including compromised aesthetics and the risk of the cable forming a large loop that could interfere with the rear tire or cause discomfort by rubbing against the rider’s thighs.
Nowadays, the use of non-stealth dropper posts is mostly limited to retrofitting older frames or frames lacking internal routing ports.
Top 3 Picks for the Bike Dropper Seatpost
Navigating the world of dropper posts can feel daunting with choices overflowing. Fear not, discerning rider! We’ve scoured the market and handpicked the top 3 dropper posts to fit your needs, be it tech-savvy, casual, or adventurous. Each pick embodies innovation, quality, and pure riding satisfaction. Prepare to conquer any descent with confidence.
No products found.
Dropper Seatpost Internal Working Process
Every dropper seatpost requires a spring mechanism to return the saddle to the fully upright position and a locking mechanism to secure it.
In earlier designs, coil springs and pins were commonly employed. However, these mechanisms were less refined and often caused the saddle to return to its upright position at an alarming speed, which could be disconcerting.
While mechanically locking designs with an air spring are still available, most modern dropper posts utilize a fully sealed hydraulic cartridge. This cartridge contains both a pressurized charge and an adjustable mechanism.
There are several advantages to this hydraulic design. Firstly, the body of the dropper post, which needs to withstand significant loads, does not have to be airtight. This allows for the use of lower-friction seals, resulting in smoother operation.
Additionally, if any issues arise with the post, replacing the cartridge is much quicker and easier than repairing the entire post.
Overall, the sealed hydraulic cartridge design offers improved performance, ease of maintenance, and enhanced durability for dropper seat posts.
Why Mountain Bikers Use Dropper Seatposts
Mountain biking is an exhilarating sport that involves dynamic movements and constant adjustments on the bike.
Lowering your saddle using a dropper post provides significant advantages, especially on steep downhill sections, by creating ample space for you to position yourself behind the seat and shift your weight towards the back of the bike.
Dropper posts offer more than just enhanced performance during descents; with a simple press of the remote lever, your saddle swiftly returns to the optimal height for efficient pedaling, eliminating the need to stop and manually readjust.
The ability to increase standover height provided by a dropper post proves advantageous in almost every form of mountain biking. Even gravel and cyclocross riders recognize the value of this feature, as it enables them to swiftly transition from grinding uphill to attacking a descent while maintaining precise control over their bike.
A Bit About Dropper Posts Specifications
Primarily, when people mention sizing and shape concerning drop-seat posts, they are referring to the key information you need to determine which one will fit your bike. Here are the essential terms you should be familiar with:
Travel
The term “travel” refers to the distance that the saddle can slide up and down on a dropper Seatpost. It indicates the range of adjustability provided by the Seatpost.
Length
The length of a dropper seatpost refers to the overall measurement from top to bottom, including any extensions at the bottom for attaching a cable’s remote. When determining the appropriate length and travel of a seatpost, it’s important to consider the height of your saddle as well.
Diameter
The diameter of a dropper seatpost is the measurement of the outer circumference of the lower tube (also known as the shaft), while the upper section may be referred to as the stanchion.
The diameter of the Seatpost needs to match the inner diameter of your bike’s seat tube. Common options for seatpost diameters are 27.2, 30.9, 31.6, and 34.9 millimeters.
How to Install Dropper Seatpost
Installing a dropper seatpost on your bike can greatly enhance your riding experience. Here’s a general guide on how to install a dropper seatpost:
Note: The specific installation process may vary depending on the brand and model of the dropper seatpost you have. Always refer to the manufacturer’s instructions provided with your seatpost for precise installation steps.
Tools you may need:
– Allen wrenches
– Cable cutters
– Cable and housing cutter (if necessary)
– Torque wrench (recommended)
Here are the steps to install a dropper seatpost:
1. Collect Tools
Gather all the necessary tools and ensure you have the correct size dropper Seatpost for your bike frame.
2. Remove the Existing Seatpost
Loosen the Seatpost clamp bolt(s) on your bike frame using an appropriate-sized Allen wrench. Slide the Seatpost out of the seat tube and set it aside.
3. Prepare the Dropper Seatpost
Before installing the dropper seatpost, check for any installation markings on the seatpost itself. These markings usually indicate the minimum insertion depth into the seat tube. Make sure to adjust the Seatpost length accordingly before proceeding.
4. Install the Dropper Seatpost into the Seat Tube
Insert the dropper seatpost into the seat tube of your bike frame. Ensure that it slides in smoothly and reaches the desired height. Follow the minimum insertion guidelines marked on the Seatpost.
5. Secure the Seatpost Clamp
Once the dropper seatpost is at the desired height, tighten the Seatpost clamp bolt(s) with an appropriate torque wrench to the manufacturer’s recommended torque settings. This ensures a secure and safe connection between the Seatpost and the frame.
6. Connect the Dropper Post Seat to the Remote Lever
If your dropper seatpost has an external cable actuation, you’ll need to install the remote lever on your handlebars.
Follow the manufacturer’s instructions to attach the lever using the provided clamp or mounting hardware. Route the cable according to the instructions, ensuring a smooth and clean path.
7. Cut and Install the Cable and Housing
If your dropper seatpost comes with an uncut cable and housing, you’ll need to measure, cut, and install them. Use cable cutters and housing cutters to cut them to the desired lengths. Install the cable and housing into the appropriate routing guides and attach them to the dropper seatpost and the remote lever.
8. Test and Adjust
Once the dropper seatpost is installed, test its functionality. Check if it moves smoothly and locks in various positions as intended. Adjust the cable tension if necessary by using the barrel adjuster located on the remote lever or at the seatpost end.
How to Remove Dropper Seatpost
To remove a dropper seatpost from your bike, follow these general steps:
1. Prepare the Necessary Tools
Gather the tools required for the removal process, including Allen wrenches, cable cutters (if necessary), and a torque wrench (recommended).
2. Lower the Dropper Seatpost
Before removing the dropper seatpost, lower it to its lowest position using the remote lever. This will make the removal process easier and prevent any damage to the Seatpost or bike frame.
3. Disconnect the Remote Lever and Cable
If your dropper seatpost is externally cable-actuated, start by disconnecting the remote lever from the handlebars. Loosen the clamp or mounting hardware holding the lever and slide it off the handlebars.
Release any tension on the cable by loosening the barrel adjuster or cable clamp at the seatpost end. Unhook or detach the cable from the remote lever.
4. Loosen the Seatpost Clamp
Locate the Seatpost clamp bolt(s) on your bike frame. Use an appropriate-sized Allen wrench to loosen and remove the bolt(s) that secure the Seatpost clamp. Note that some seatpost clamps may have more than one bolt. Carefully set aside the bolts.
5. Remove the Dropper Seatpost
With the Seatpost clamp loosened, gently pull the dropper seatpost out of the seat tube. If it’s tight or stuck, try twisting it slightly while pulling to loosen it. Be cautious not to force it excessively, as this may damage the Seatpost or bike frame.
6. Clean and Inspect
Once the dropper seatpost is removed, take the opportunity to clean the seat tube and inspect both the Seatpost and the bike frame for any signs of damage, wear, or dirt. Wipe down the Seatpost to remove any dirt or debris.
7. Store or Replace the Seatpost
If you plan to reinstall the same dropper seatpost, store it in a clean and safe location until you’re ready to reinstall it. If you’re replacing it with a different seatpost, follow the installation instructions provided with the new seatpost.
How Much Travel Does a Dropper Seatpost Need
The term “travel” in relation to seat dropper posts refers to the extent of vertical movement the post allows, determining how far you can adjust your saddle position while maintaining an optimal pedaling stance.
Lower-priced dropper posts typically offer less travel, as longer travel requires stronger and more precise internal mechanisms.
Most dropper posts start with a 100mm drop, which provides a noticeable difference. However, I have found that longer-travel posts excel at maximizing clearance while maintaining an appropriate seated pedaling height.
The typical range of drop for dropper posts falls between 125mm and 170mm, which suits the needs of most riders.
Longer-travel posts with travel lengths from 170mm up to 210mm do exist, but they may pose challenges for shorter riders or specific bike frames. Nevertheless, as technology advances and bike manufacturers design frames with shorter seat tubes, longer travel posts are becoming more prevalent.
To determine the appropriate dropper post length, measure your current Seatpost from the saddle rail to the top of the seat collar, and compare this measurement to the length of the dropper post from the saddle rail to below its collar.
If the measurements are the same or smaller, you have a compatible match. If the dropper post is longer, you will need to explore alternative options.
What to Look for While Buying Dropper Post
With a wide range of excellent dropper posts available for mountain bikes, it’s important to narrow down your options and select the best one for your specific bike. To help you make an informed decision, here are the key factors to consider:
Seat Post Diameter
When searching for a new dropper post or considering an upgrade, the first factor to check is the seat post diameter that matches your bike. Mountain bikes typically have inner seat tube diameters of 30.9mm, 31.6mm, or 34.9mm, while gravel and road bikes may have a diameter of 27.2mm.
Dropper posts are available in all four sizes, although not all models or brands offer each size. To determine your seat post size, you can check the markings on your current seat post or use calipers to measure the inside diameter of the tube, ensuring you measure the inside, not the outside.
While it is technically possible to use a smaller diameter post with a larger seat tube by using a properly sized shim, this is not recommended and may even void your frame warranty.
There are numerous models and price ranges available, so you can find a suitable option without compromising on fit and safety.
Overall Length
Alongside the diameter, the length of the dropper post is another crucial consideration related to the bike’s frame. Some seat tubes have bent to accommodate suspension pivots or wheel clearance, which restricts the maximum length of the post that can fit inside.
Seat collar heights also vary, affecting the usable length of the post. Additionally, riders have different sizes, so those with shorter legs need to pay particular attention to the overall length of the dropper post.
Most brands provide sizing information for their posts, and some, like One Up, offer convenient online fit calculators. To determine the appropriate post length, start by setting your existing seat post to its maximum height, the position you generally prefer for pedaling.
Measure the distance between your saddle rails and the seat tube collar. Remove the seat post and measure from the inside of the collar to the first obstruction, which could be a bend or the end of the tube.
Add these two measurements together to get a rough estimate of the maximum post length that can fit. Most riders prefer to choose the longest post possible for maximum travel. Therefore, select the first available option shorter than your maximum length.
For instance, if the combined measurement of the saddle to collar plus collar to obstruction on your bike is 460mm, and there are post lengths available in 480mm, 440mm, and 385mm, opt for the 440mm model since it is less than 460mm.
Dropper Post Travel
Determining the appropriate amount of travel for your dropper post is essential. In general, more travel is almost always preferable when it comes to MTB dropper posts. Modern posts typically offer infinite adjustability, allowing you to set them at any height between the maximum and minimum positions.
Cartridge Type
Dropper posts utilize a pressurized cartridge to raise the seat, and certain models allow you to adjust the pressure to customize the speed of the return or accommodate a heavier seat, such as when using a seat bag.
Posts that offer pressure adjustments typically feature a Schrader valve, allowing you to charge them with a high-pressure shock pump.
On the other hand, Dropper posts with sealed cartridges do not provide any adjustment options. Out of the box, some of these posts may have faster return speeds, referring to how quickly the seat post raises up compared to others.
A post with a faster return speed may require some adjustment and could result in initial surprises, but ultimately, most riders prefer a snappier post.
Certain brands incorporate additional techniques and features to optimize return speeds. For instance, Fox utilizes a low-friction Kashima coating on their premium Factory Transfer post to enhance performance.
Serviceability
Dropper posts share similarities with suspension components, so if you’re comfortable disassembling your fork or shock, you might prefer a dropper post that can be serviced.
Certain brands offer replaceable cartridges or provide service kits for home mechanics. Alternatively, if you encounter any maintenance issues, your local bike shop should be able to assist you. If not, you can always send your post in for repairs.
Internal vs. External Routing
Nowadays, most mountain bikes, and even some road and gravel bikes, are equipped with a hole near the bottom of the seat tube for internally routing a dropper remote cable.
Dropper posts are generally designed with internal routing in mind, but there are still some brands that offer external options.
If your seat tube doesn’t have a routing hole, still you can opt for an externally routed dropper post to enjoy its benefits. Alternatively, you could consider a wireless version, which is much easier to install and provides a cleaner appearance.
Side-to-Side Play
Over time, most dropper posts may develop a slight amount of side-to-side play. A small degree of saddle rotation is usually tolerable, but excessive play can become bothersome. To mitigate this, the post stanchions are typically internally “keyed” to fit into a channel that prevents rotation.
Weight
Interestingly, around the time dropper posts were invented, mountain bikers shifted their focus away from obsessing over weight. Nowadays, there is less emphasis on designing lighter dropper seat posts.
However, if weight is a significant factor for you, it’s something you can consider and compare between different options.
Remote Levers
The remote lever is a crucial component of any dropper seatpost system. However, these days, many posts are sold without a remote lever. This approach not only helps reduce costs but also allows users who already have a post to upgrade without purchasing an additional lever.
There are three primary types of dropper remotes available:
Mechanical Levers
Mechanical levers are the most common type and rely on a shifter cable that connects the remote to the post for activation. There are typically two styles of mechanical levers: shifter or one-by style and over-the-bar style.
However, the former is more prevalent in today’s market. Over-the-bar remotes can be cumbersome to use and are generally recommended only if you still use a front derailleur shifter.
It’s worth noting that you can mix and match mechanical levers and posts, meaning you don’t need a specific lever brand to use with your dropper post, such as using a PNW lever with a PNW loam dropper post.
When utilizing mechanical remotes, it is necessary to trim the shifter cable and secure it at one end using a set screw. It is preferable for the set screw to be positioned at the lever end rather than at the actuator located at the bottom of the post.
By clamping the cable at the lever, installation becomes easier, and potential fit issues inside the seat tube are minimized. Most manufacturers are transitioning to this setup, although some posts may still require a barrel-style set screw at the post itself.
Wireless Remotes
Wireless dropper post remotes utilize electronic technology to adjust the seat height, providing certain advantages over mechanical systems. Firstly, they are easier to install and transfer between bikes since there is no need to route cables.
However, these systems rely on batteries that require regular charging. Brands like SRAM and Magura offer proprietary remotes that are included with the purchase of their dropper posts.
Hydraulic Remotes
Only a few dropper posts feature a hydraulic remote, with the RockShox Reverb being a well-known example. The lever and hose system functions similarly to a disc brake, which means it involves bleeding and potential leakage challenges. I recommend opting for a post with either a mechanical or wireless remote instead.
The quality of dropper post remotes can vary significantly, and each may offer a distinct feel. This is one aspect where it’s generally advisable not to choose the cheapest option, but you don’t necessarily have to go for the most expensive one either.
How to Maintain Dropper Post
Maintaining a dropper post for your bike is essential to ensure its proper functioning and longevity. Here are some steps you can follow to maintain your dropper post:
1. Clean the Post
Regularly clean your dropper post to remove dirt, grime, and debris that can affect its performance. Use a soft cloth or a brush along with mild soap or bike-specific cleaner to clean the post thoroughly.
Avoid using harsh chemicals or high-pressure water, as they can damage the seals or internal components.
2. Lubricate Moving Parts
Apply a thin layer of silicone-based lubricant to the stanchion, particularly the area where the post slides up and down. This helps reduce friction and ensures smooth operation. Be careful not to use excessive lubricant, as it can attract dirt and cause more harm than good.
3. Check for Play
While holding the saddle, wiggle it from side to side and check for any excessive play or looseness. If you notice any significant movement, it might indicate worn-out bushings or bearings. In such cases, consult your bike manufacturer’s instructions or take it to a professional bike shop for servicing.
4. Inspect Cables and Housing
Ensure that the cables and housing are in good condition and free from fraying, kinks, or damage. If you notice any issues, replace them as necessary. Properly tensioned cables are important for the smooth operation of the dropper post.
5. Test the Remote Lever
Check the functioning of the remote lever that controls the dropper post. Ensure that it engages and releases the post smoothly. If you notice any issues like sticking or poor return action, consider servicing or replacing the lever.
6. Bleed Hydraulic Dropper Posts (if applicable)
If your dropper post is hydraulic, it may require periodic bleeding to maintain its performance. Refer to the manufacturer’s instructions or seek professional assistance to perform this task correctly. Hydraulic systems can be more complex, and it’s best to follow the specific guidelines provided.
Best Dropper Posts for Mountain Biking to Use in 2026
1. Bike Yoke Revive
No products found.
Measured Weight: 684g (185mm) | Remote: Triggy
The Revive stands out as one of the most exceptional droppers I’ve ever experienced. Its travel is incredibly smooth, and the compression force required is super easy. With its unique design, it introduces the innovative Revive Valve, allowing you to effortlessly reset the hydraulic internals if any sag occurs over time.
Included with the post is Bike Yoke’s Triggy 1x remote lever, which I consider to be one of the best in the market. Setting up the Revive is hassle-free, and its sturdy two-bolt saddle clamp design adds to its overall appeal.
I encountered very few drawbacks with Revive. The version I tested, which had a travel length of 185mm, was slightly heavier and longer than its counterparts with shorter travel. However, when considering the grams per millimeter of travel, it stands as one of the lightest options available.
While it may come with a higher price tag, I firmly believe that Revive’s excellent performance and high-quality components make it well worth the investment.
Pros
- Revive reset valve
- Smooth infinite travel
- Adjustable spring rate
- Excellent remote lever
Cons
- Expensive
- Long extended length (185mm version tested)
2. Tranz-X Kitsuma Air
No products found.
Measured Weight: 732g (200mm) | Remote: Tranz-X 1x
Tranz-X has recently expanded its distribution and now offers some of the most affordable dropper posts available in the market. Among them, the Kitsuma Air stands out as the most affordable model I’ve had the opportunity to test.
Surprisingly, it delivered consistent and reliable performance throughout my testing. Installation is a breeze, and you have the freedom to use any remote lever of your choice.
The super-smooth travel of the Kitsuma Air, both during compression and extension, left me thoroughly impressed. Its air-spring feature allows for an adjustable return rate, adding to its versatility.
The simple yet sturdy two-bolt clamp effectively secures the saddle rails, and I encountered no issues during my testing.
It’s worth noting that the 200mm version I tested is one of the heaviest in its category. However, considering its longer drop length, the weight is actually quite reasonable. The Kitsuma Air is sold as a post only, meaning you’ll need to purchase a remote separately if you don’t already own one.
Additionally, the extended post lengths may pose fitment challenges for certain riders and bikes. Despite these considerations, I was extremely impressed by the performance of the Tranz-X Kitsuma Air, particularly considering its affordability.
Pros
- Adjustable air spring
- Reasonable price tag
- Buttery smooth travel
- Offered in three drop lengths
Cons
- Lacks bling factor
- Longer overall length
3. OneUp Components V2
No products found.
Measured Weight: 662g (180mm) | Remote: OneUp
The OneUp V2 has secured its place as one of my all-time favorite dropper posts. Not only does it deliver a stellar performance, but it also comes at an incredibly affordable price, making it one of the best values in my test.
Surprisingly, this dropper post easily matches, if not surpasses, the performance of some models that cost twice as much. OneUp is dedicated to providing riders with the maximum amount of drop possible, and they’ve managed to shave every millimeter of unnecessary length, resulting in an impressively short stack height and extended overall length.
Moreover, it features adjustable travel, allowing you to fine-tune the drop length for a more personalized fit. Installing the OneUp V2 is a breeze, especially with the cut end of the cable at the remote. I was thoroughly impressed by its smooth travel and easy compression force, which made saddle height adjustments a breeze.
The OneUp remote offers excellent ergonomics, a lightweight lever feel, and a short throw, all contributing to its user-friendly design. Additionally, the OneUp V2 is available in various lengths (120mm, 150mm, 180mm, 210mm, and 240mm) and the three most common diameters, catering to a wide range of bike setups.
One minor drawback of this model is that it doesn’t come automatically bundled with a remote lever. While it may be slightly inconvenient to purchase a remote separately, this actually allows you to select the lever that suits your preferences.
Pros
- Lightweight
- Smooth travel
- Reasonably priced
- Very short stack height
- Adjustable travel with shims
Cons
- Remote lever sold separately
4. Wolf Tooth Components Resolve
No products found.
Measured Weight: 592g (200mm) | Remote tested: OneUp V2
Wolf Tooth Components, an American company known for producing a wide range of components, has ventured into the dropper post market with its first-ever offering, the Resolve.
Weighing in at just 545 grams (post only) and 592 grams with a remote for my 200mm travel version, it takes the crown as the lightest post in its class—a remarkable achievement considering its generous amount of travel.
Many riders prioritize lightweight components to reduce overall bike weight, making the Wolf Tooth post an excellent choice for those who are weight-conscious. Not only does it excel in weight savings, but its on-trail performance is also incredibly reliable.
Moreover, it boasts some impressive features, including a self-bleeding cartridge that prevents unwanted sag, travel reduction capabilities, and the option to swap the lower tube for a different diameter when transitioning to a new bike frame.
Additionally, Wolf Tooth provides readily available parts and excellent technical resources to support users in servicing their products at home.
While I was highly impressed by this post, it’s important to note that it comes at a higher price point. Riders on a tight budget can find highly functional posts at significantly lower prices.
However, considering Wolf Tooth’s reputation for producing great products, I anticipate that this post will deliver lasting performance that justifies its expense in the long run.
Pros
- Very light
- Highly adjustable
- Self bleeding cartridge
- Excellent support from the manufacturer
Cons
- Expensive
5. RockShox Reverb AXS
No products found.
Measured Weight: 768g (150mm) | Remote: AXS 1x remote
RockShox has introduced an exciting addition to the dropper post market with the RockShox Reverb AXS. By integrating their trusted Reverb design with AXS technology, RockShox has made wireless technology more accessible.
The post delivers smooth and seamless compression and extension, and I found it to be less affected by cold temperatures compared to the standard Reverb Stealth model. In the event of sag, RockShox has thoughtfully included a Vent Valve for convenient at-home fixes.
The saddle clamp features a user-friendly single bolt clamp and separate tilt adjustment. Notably, the remote is exceptional, boasting a large paddle-shaped button that requires minimal force or movement compared to traditional cable-actuated systems.
The primary drawback of the Reverb AXS is its price. It is undeniably expensive, which may deter many riders from considering it. Surprisingly, it also carries a bit of weight despite its high price tag.
Pros
- No cables
- Easy installation
- Excellent remote
- Improved performance compared to the regular version
Cons
- Heavier weight
- Very expensive
- Not compatible with saddlebags
- You have to remember to charge the batteries
6. Fox Racing Shox Transfer Performance Elite
No products found.
Measured Weight: 733g (175mm) | Remote: Transfer 1x remote
The Fox Racing Shox Transfer Performance Elite stands as one of my preferred all-around dropper posts. Fox Racing Shox has successfully addressed the weaknesses of the previous model and significantly enhanced them in its latest iteration.
With a reduced weight, shorter stack height, redesigned saddle clamp, and overall shorter length, this post has transitioned from a mid-range contender to one of the top-notch options available today.
It incorporates the same impeccably smooth internals as its predecessor, ensuring swift and effortless adjustments while out on the trail.
The post requires minimal force to drop, and its return is both swift and reliable, featuring a satisfying thump upon reaching full extension. Notably, Fox has also revamped their 1x remote lever, which now boasts a larger, high-leverage, textured thumb paddle resembling a shifter.
Its operation utilizes a sealed cartridge bearing, delivering consistent and smooth action. Overall, the post and remote combination proved to be one of my favorites during testing.
While the updates bring forth many commendable qualities, the post still exhibits a couple of minor drawbacks. Despite Fox’s efforts to reduce weight, it remains on the heavier side of the spectrum.
While it doesn’t qualify as excessively heavy at 4.2 grams per millimeter of travel, it falls short of matching the weight of the lightest posts currently available.
Additionally, the Transfer lacks certain features offered by other newly introduced posts in the market. It does not offer adjustable travel to fine-tune the fit, and the return rate is fixed. Although these factors are by no means deal-breakers, having these options would certainly be desirable.
Pros
- Easy to install
- Short stack height
- Great remote lever
- Smooth and consistent
Cons
- No travel adjustment
- Above-average weight
7. 9point8 Fall Line
Weight: 510g (150mm, standard) and 441g (150mm, R version) | Remote: No Remote or Cable
If durability and reliability are your top priorities when it comes to a dropper post, look no further than the 9point8 Fall Line series. This exceptional series is available in three versions: two “regular” models offering 75-150mm or 150-200mm of travel and a lightweight Fall Line R model with 75-150mm of travel.
What sets them apart are several unique features. To begin with, these posts employ a mechanical locking mechanism in their internals. This means that even if the air spring or damping were to fail, your saddle would remain securely in position.
Furthermore, you can lift the bike by the saddle without the post raising—an advantage few other droppers can claim. In the unlikely event of an internal failure, you can manually raise or lower the post, and it will steadfastly maintain its position.
The clamp head offers independent fore/aft and angle adjustment, allowing you to make changes without disrupting the other setting. The collar can be easily twisted on and off by hand, eliminating the need for special tools during maintenance or cleaning.
With an air-damped design, there’s no risk of leakage. Additionally, the cable connection employs a quick-connect design, enabling effortless post-transfer between bikes. Simply install a remote on both bikes and move the post as desired.
The only minor drawback is that the tall clamp and collar may slightly reduce travel or height, which may be a consideration for certain riders or bikes.
Pros
- Super Durable
- Great Features
- Easy to Service
- Excellent in Cold Weather
Cons
- Slightly less travel per length than others
Dropper Post — Bottom Line
If you’re unfamiliar with dropper posts, it’s time to get acquainted with them! Having a dropper post is a game-changer as it ensures your saddle is always in the optimal position for charging hard, tackling technical maneuvers, and conquering challenging climbs.
Gone are the days of stopping at the top of a climb to manually adjust your seat for the descent. And even if you’re already well-versed in dropper posts, it’s worth noting that significant advancements in technology and functionality have been made in recent years.
So, try checking them out for more ease and comfort.
Please share your thoughts and feedback on the article in the comments section. Please like, share, and follow our Facebook Page, and keep visiting our website for more guides like this.
Dropper Post — Frequently Asked Questions
Will a dropper post work with any saddle?
No, not all dropper seat posts are compatible with every saddle. The majority of dropper posts are designed to work with saddles that have traditional round rails. If your bike seat has round metal rails, it will likely be compatible with most dropper seat posts.
However, if you have a saddle with carbon fiber oblong rails measuring 7x9mm, you need to ensure that the seatpost’s clamps are specifically designed to work with such rails. It is crucial not to force the clamps onto carbon rails if they are not intended for that purpose.
Certain brands, like Fall Line, offer carbon-specific or universal clamps that are shaped to accommodate these oval rails.
What happens to my dropper post in cold weather?
Unless you have a hydraulic dropper post, you should encounter minimal issues in cold weather. You may notice that the seatpost operates a bit slower than usual due to the slight solidification of the oil in colder temperatures.
In extremely cold conditions, such as when using a dropper post on a winter fat bike, it is important to monitor the rubber o-rings and seals. These components can become rigid or shrink in the cold, potentially leading to less smooth functioning and binding of the internal mechanisms.
Is a dropper compatible with a bikepacking bag setup?
The compatibility of a dropper post with a bikepacking bag setup depends on the specific configuration of your bags. While you can attach the same types of bags that you would normally use with a standard seatpost and saddle on a dropper post, it may limit the extent to which you can lower your dropper post.
If you have a large rear saddlebag that extends significantly behind your saddle, a dropper post might cause the bag to come into contact with your rear wheel when you drop your saddle.
Additionally, if you have large rear panniers, operating a dropper post might be cumbersome. However, you always have the option to keep your saddle in the fully raised position, which eliminates any potential issues.
Can I use a dropper post for a gravel or cyclocross bike?
Absolutely! However, it’s important to ensure that the dropper post you choose is compatible with your bike frame and seat post size. Many companies are now offering 27.2mm diameter options for their seat posts, especially those with less drop.
Related: