Are you tired of being chained down? No, I’m not talking about metaphorical chains here, but the literal ones that hold your bicycle together. Sometimes, circumstances arise where you find yourself in need of separating that sturdy link that connects your bike’s gears and cranks.
Whether it’s for repairs, upgrades, or a spontaneous escape from a sticky situation, learning how to break a bike chain can be an invaluable skill for any cyclist. But what if you don’t have access to fancy tools or find yourself in a dire situation where resourcefulness is key?
Fear not, fellow adventurers; through this article, we’ll explore both the art of breaking a bike chain with tools and the exhilarating realm of doing it without any specialized equipment.
So, buckle up (or should I say, unbuckle?) as we embark on a journey to unleash the freedom hidden within the metal links that bind your two-wheeled companion!
What is a Bike Chain
A bike chain is a crucial component of a bicycle’s drivetrain system. It serves as the primary means of transferring power from the rider’s legs to the rear wheel, propelling the bike forward.
Typically made of metal, a bike chain consists of a series of interconnected links that wrap around the front and rear sprockets (gears) and are driven by the movement of the pedals. These links are designed to mesh precisely with the teeth of the sprockets, ensuring smooth and efficient power transmission.
Bike chains come in various lengths and widths, depending on the specific bike and drivetrain configuration. They require regular maintenance, such as cleaning, lubrication, and occasional replacement, to ensure optimal performance and longevity.
Now that we have established a solid understanding of what a bike chain is, let’s focus our attention solely on the topic at hand: learning how to break a bike chain. In the subsequent sections of this article, we will delve into the various methods and techniques involved in breaking a bike chain.
Cases Under Which Breaking a Bike Chain is the Right Step
Breaking a bike chain becomes necessary in several scenarios. Here are a few cases where breaking a bike chain is often required:
1. Maintenance and Repairs
Over time, bike chains can wear out, become damaged, or develop issues like stiff links. Breaking a bike chain allows for proper cleaning, lubrication, and inspection. Additionally, if a chain needs to be replaced entirely, breaking it is a necessary step.
2. Upgrading Components
When upgrading the drivetrain components of a bike, such as replacing the cassette or front chain ring, breaking a bike chain is often necessary to remove the old components and install the new ones.
3. Adjusting Chain Length
Sometimes, it may be necessary to adjust the length of the bike chain, especially when changing gear ratios or using different wheel sizes. Breaking the chain allows for removing excess links or adding new chain links to achieve the desired length.
4. Emergency Situations
In rare cases, a bike chain may become entangled or stuck in a way that compromises safety or prevents further riding. Breaking a bike chain can provide a temporary solution to free the bike or make it easier to transport.
Note: Breaking a bike chain is a practical skill that can be valuable in various situations, allowing for maintenance, upgrades, and addressing unexpected circumstances. However, it’s essential to exercise caution and follow proper techniques when performing chain-breaking procedures to avoid any unnecessary damage or injuries.
Different Ways for Breaking a Bike Chain
There are various methods for breaking a bike chain, depending on the tools available and personal preference. Here are four common ways to break a bike chain:
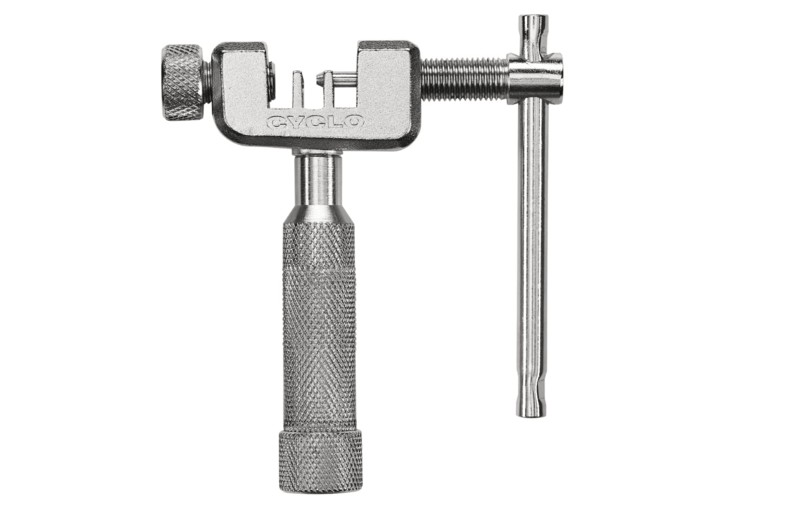
Method 1: Chain Breaker Tool
It is important to eliminate any slack in the chain when attempting to break it. If you are working with a bicycle chain, shift it to the largest front and rear sprockets, then shift it to the smallest cogs to make the chain wrap around the derailleur pulleys tightly.
Ensure that the chain does not make contact with itself by adjusting the position of the derailleur pulley.
Identify the specific connecting rivet and avoid breaking the chain at that point. Connecting rivets will have distinctive characteristics that set them apart from other rivets in the chain, such as special flaring or color.
When using a chain tool to break the chain, make sure you choose a rivet that is several positions away from any connecting rivets. If you are facing difficulty while identifying the connecting rivets in your chain, search for the brand name of your chain along with the term “connecting rivets“.
The chain manufacturer likely provides images of the connecting rivets on their website.
Now the question comes how to break the chain links. Well, position the chain tool on the selected rivet to break the chain. Align the driving pin of the chain tool with the rivet in a straight line and ensure that they are in contact.
If your chain tool has a receptacle for the pin after it is removed, ensure that the rivet aligns with this receptacle as well.
You may need to unscrew a part of the chain tool to retract the driving pin before placing the tool on the rivet. Make sure the driving pin is centered on the rivet head; otherwise, it will not be possible to remove it.
Once the driving pin is aligned with the rivet head, exert force and rotate the handle gradually to drive the rivet out of the front plate and partially through the rear plate.
Before completely removing the rivet, retract the chain pin and break the chain using your thumbs, leaving the rivet slightly protruding from the rear plate. This method allows for easy identification of the hole if you decide to reconnect the link.
If you do not intend to reinstall or repair the chain, you can push the rivet all the way out using the chain tool.
Method 2: Pliers

To prevent any slack in the chain, shift it to the largest front and rear sprockets, and then shift it to the smallest cogs to wrap it tightly around the derailleur pulleys. This is the same step as we discussed above.
This will make the chain as taut as possible. Ensure that the chain does not come into contact with itself by avoiding excessive pulling of the derailleur pulley.
Next, locate the master link on the chain. In a linked chain, the master link will have a distinctive pair of side plates that may differ in color from the other links. This is the link you need to disengage in order to break the chain using pliers.
The master link often includes an embossed arrow pointing toward the inside of the chain loop.
Use the needle nose pliers to separate the master link. Position the pliers over the master link so that one head is placed on the outer plate side of the master link pin and will be squeezed in the direction indicated by the arrow on the side plate.
The other head of the pliers should be positioned on the outer side of the opposite pin. Squeeze the pliers together to bring the pins closer, and press both side plates inward until the link breaks. If you have special quick link pliers designed for master links, they will automatically press the side plates inward for you.
Method 3: Bolt Cutters
Bolt cutters often include an adjustment bolt that enables you to modify the tension on the blades. Utilize this bolt to establish the appropriate tension based on the hardness of the chain you intend to break and your own comfort during the operation.
In the case of smaller chains like bike chains, it is likely that you won’t need to adjust the bolt cutters, as the weakest setting should be sufficient.
Mark the desired location for the chain break. To ensure a precise cut in the correct spot, use a marking line or a small dot to indicate where you want to make the break. Employ a marker, paint, or sharp blade to create the mark.
If feasible, you can also secure the chain in a clamp before cutting to facilitate the breaking process. However, clamping is not strictly necessary when using bolt cutters to break a chain.
Open the blades and position the cutters over the marked spot. Pull the handles of the bolt cutters apart to open the blades, ensuring they are fully extended before proceeding. Then, align the cutter head in a manner that situates the marked section of the chain between the blades.
Now bring the handles back together to close the blades over the chain, starting with a slow and steady motion. Once the blades have made contact with the chain, continue closing them while applying force until the chain is broken.
Maintain a firm grip while closing the blades to prevent them from slipping and causing harm to yourself or others nearby. In some cases, certain chains may require you to break off from the initial cut, reposition the blades over the cut, and apply force a second time before they finally break.
Method 4: Makeshift Chain Tool
Are you wondering how to break a chain link without any specialized tools? The answer is yes; it is indeed possible to break a chain without the need for specialized tools.
Items needed:
- Chain
- Hammer or any blunt object
- Screwdriver, nail, or sturdy thin stick
- Socket or any object with a hollow center
Firstly, place the chain on top of the socket, ensuring that it is placed with the chain facing downwards and the rivet resting on the hollow area. This arrangement will facilitate the subsequent popping out of the rivet.
Using your hands, position the screwdriver or durable stick on top of the rivet. When selecting your tool, ensure that the tip is either the same size or smaller than the diameter of the rivet.
Next, use a hammer to drive down the screwdriver, pushing the chain rivet off. If you prefer to keep the rivet partially attached, apply mild and continuous force. Alternatively, if you wish to fully detach the component, swing the hammer more forcefully until the rivet is separated.
Safety Precautions to Take While Breaking a Bike Chain
When breaking a bike chain, it’s important to follow some safety precautions to prevent injury or damage. Here are some safety tips to keep in mind:
1. Wear protective gear
Always wear appropriate safety gear, such as gloves and safety glasses, to protect your hands and eyes from potential injuries.
2. Choose a well-ventilated area
Find a well-ventilated space with plenty of room to work, preferably outdoors, to ensure good airflow and minimize the risk of inhaling harmful fumes or dust particles.
3. Secure the bike
Make sure the bike is stable and won’t move or fall while you’re working on it. Use a bike stand, or lean it against a sturdy object, ensuring it won’t tip over.
4. Release tension from the chain
Before breaking the chain, shift the gears to the smallest chain ring and smallest rear cog or the position that provides the least amount of tension on the chain. This will make it easier to remove or reassemble the chain.
5. Use proper tools
Use a chain tool specifically designed for removing or breaking chains. Avoid using makeshift tools that may damage the chain or cause injury.
6. Follow the manufacturer’s instructions
Different chains may require slightly different techniques for removal. Refer to the manufacturer’s instructions or consult a bike mechanic if you’re unsure about the specific procedure for your chain.
7. Handle the chain carefully
Be cautious when handling the chain, as it can have sharp edges. Avoid placing your fingers near the pin you’re pushing out, and keep a firm grip to prevent the chain from slipping unexpectedly.
8. Dispose of the chain properly
After breaking the chain, make sure to store or dispose of it safely. Avoid leaving it lying around where it could cause injuries or become tangled.
Remember, if you’re unsure about the process or feel uncomfortable performing the task, it’s always a good idea to seek assistance from a professional bike mechanic. They have the expertise and tools necessary to handle bike maintenance safely and efficiently.
How to Break a Bike Chain — Wrapping Up
Breaking a bike chain, whether with or without tools, can be a useful skill for any cyclist to have. In situations where a chain becomes damaged or needs to be replaced, knowing how to remove it safely and efficiently can save time and frustration.
While having the right tools can make the task easier, it’s also possible to break a chain using improvised methods in a pinch. Remember, practicing this skill in a controlled environment before needing to do it on the road or trail is always recommended.
So, equip yourself with the knowledge and techniques to break a bike chain, and you’ll be better prepared to tackle unexpected challenges and keep pedaling toward your cycling goals.
Please share your thoughts and feedback on the article in the comments section. Please like, share, and follow our Facebook Page for more guides like this.
How to Break a Bike Chain — Frequently Asked Questions
How do I reconnect a bike chain after breaking it?
Reconnecting a bike chain depends on the type of chain you have. If your chain has a quick-release link, you can easily reconnect it by aligning the ends of the chain and snapping the quick link into place.
If your chain doesn’t have a quick link, you must use a chain tool to push the pin back into the chain, rejoining the links.
Can I break a bike chain without a chain tool?
Breaking a bike chain without a chain tool can be challenging but sometimes possible. One alternative method is using a hammer and a nail. Place the nail on the chain link pin and use the hammer to tap it gently until the pin starts to come out.
However, this method is not recommended as it can damage the chain and may be less effective than using a proper chain tool.
How do I determine which link to break?
If you need to break a bike chain for repair or replacement purposes, it’s best to select a link that has a pin or special connecting rivet rather than a quick link. Look for a link that appears similar to the others but has a slightly different shape. This link is typically meant to be removed and can be easily identified.
Do all bikes have the same chain size?
No, bike chains come in different sizes to accommodate different drivetrain configurations. The most common sizes are 1/8-inch and 3/32-inch, which refer to the width of the chain. It’s important to ensure you get the correct chain size when replacing a broken chain.
Can I reuse a broken bike chain?
It is not recommended to reuse a broken chain. When a chain breaks, it can be a sign of wear and damage, and reusing it may compromise the overall performance and safety of your bike. It is best to replace a broken chain with a new one.
Related